Please see the drawing tutorial in the video below
You can refer to the simple step-by-step drawing guide below
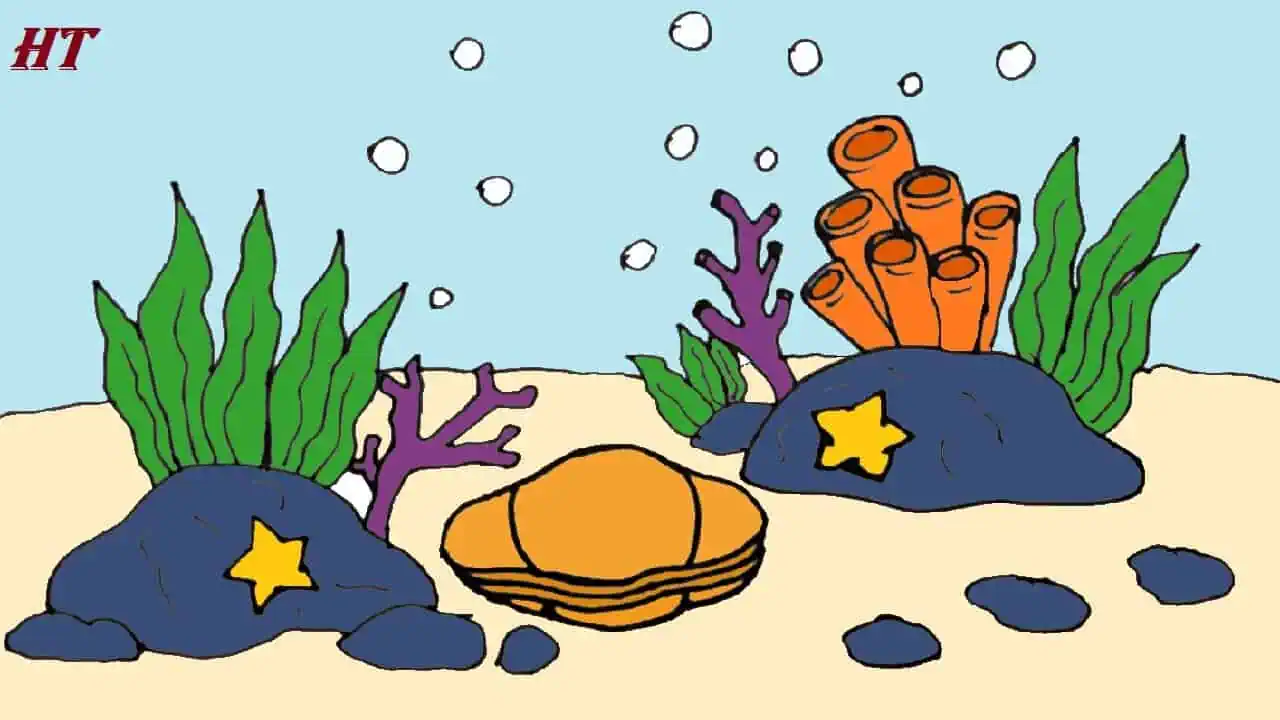
Step 1. Sketch the seashell

Sketch the bumpy round shape of the seashell as shown.
Step 2. Draw folds and open the clamshell

First let’s draw the opening of the seashell by creating three bumpy lines that curve upward. Next, create folds in the top and bottom shells by drawing curved lines.
Step 3. Draw the rock

Draw the stone by forming oblong circles of different sizes as shown.
Step 4. Attach a starfish

Attach a starfish to a rock by forming a star shape.
Step 5. Draw seaweed

Now, let’s draw some seaweed growing behind the rocks! First, create the middle outline of the seaweed by drawing a long wavy line. Next, create wavy lines on either side of the midrib to create a seaweed shape.
Step 6. Add coral

Add coral by creating thin stick-like shapes that branch out into more stick-like shapes similar to the illustration.
Step 7. Create sponges

First let’s sketch the long tubular shape of the sponge. Next, draw an oval on top to form the opening of the sponge.
Step 8. Add bubbles

Now let’s add some bubbles by creating circles of different sizes. Also, create a wavy horizontal line to draw the sand.
Step 9. Complete the underwater scene drawing
Complete your drawing of the underwater scene by first coloring the rocks with a purple pencil. Use a pink pencil to color the coral and a red pencil to color the sponge. Next, fill in the seaweed with a green pencil. Now, color the starfish with an orange pen. Then, mainly color the clam shell with a light orange pen and the opening with a dark orange pen. Finally, color the seabed with an orange pen and the water with different shades of blue. Don’t forget to color the bubbles with a light blue pencil!


