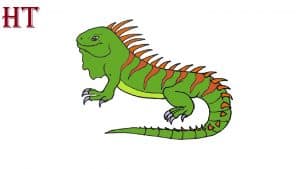
How to Draw an Iguana Easy with this how-to video and step-by-step drawing instructions. Easy animals to draw for beginners and kids.

Please see the drawing tutorial in the video below
You can refer to the simple step-by-step drawing guide below
Step 1
Let’s draw an iguana! Drawing the head, trace a squiggly circle.
Step 2
For the back, trace a line going across, making sure to bend it as you go.
Step 3
Next, draw two squiggly lines for the front leg and trace three squiggly toes!
Step 4
Draw the belly, starting at the front leg, making your way across the page.
Step 5
The hind foot is squiggly too but thick and short. Here’s a tip: try zigzagging the lines of the leg and at the bottom, draw the foot. Don’t forget the toes!
Step 6
For the pointy tail, start where the back ends, making a loop all the way to the front of the iguana’s body. Start another line at the hind leg, looping it to the front too, connecting it to the end of the first line.
Step 7
Add the spikes! These are fun: they are like upside down letter Vs all along the back.
Step 8
Draw the neck by tracing a line that connects the head and the front leg. Also, draw a squiggly semi-circle for the throat.
Step 9
Draw a circle for the eye, two dots for the nose and a thin line for the mouth.
Step 10
Last, draw the pointy claws at the end of the toes. There’s an iguana!


