How to Draw an Echidna with this how-to video and step by step drawing instructions. Draw along with these simple 6 drawing steps. You’ll learn the fundamentals for drawing an echidna.
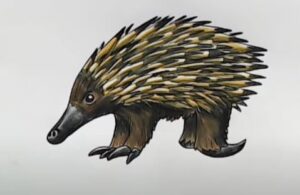
Please see Echidna drawing tutorial in the video below
You can refer to Echidna simple step by step drawing guide below
Step 1. Start drawing the eyes
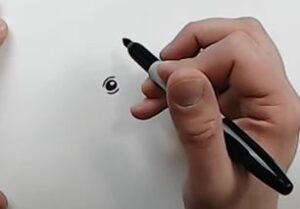
First, determine where to draw the eye using a circle and two small curved lines above and below the eye as shown.
Step 2. Draw the head
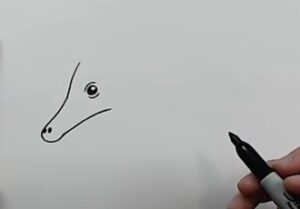
Next, draw the head, sketch the shape of the echidna’s head as shown. Emphasize its thin pointed snout and on the tip of the snout add two dots for nostrils.
Step 3. Draw the legs
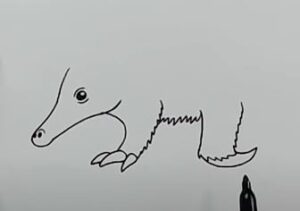
Shape the echidna’s short legs attached to the body. Draw the claws on the echidna’s front feet facing left. Then add the claws on the back legs facing right as shown.
Step 4. Form the spine
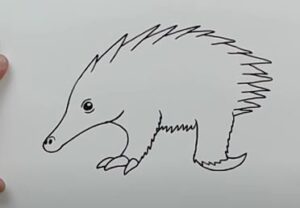
Now, draw a zigzag circle as shown to form the spikes on the echidna’s back. Next, draw shorter zigzag lines to create a pointed pattern on the back.
Step 5. Add details
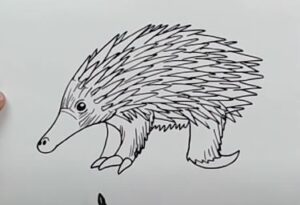
On the echidna’s body, draw sharp spines and add some details on the head to make it look more realistic
Step 6. Complete Echidna drawing

Complete your echidna drawing by coloring the quills with orange and yellow markers. Next, color in the echidna’s snout and claws with a black or gray pen. Then, color in the rest of the echidna’s body with a dark brown pen.


4.5