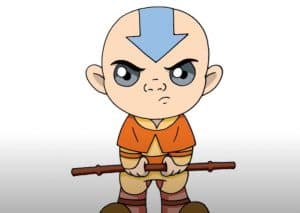
How to draw aang from avatar with this how-to video and step-by-step drawing instructions. How to draw cartoons for beginners and kids.

Please see the drawing tutorial in the video below
You can refer to the simple step-by-step drawing guide below
Step 1
The first step is nothing special compared to the early stages of learning to draw by other people who are not related to anime. As you probably know, in the first steps we draw a stickman. Due to the fact that we draw the anime character, his head is a little more than that of an ordinary man. For the rest, we draw the usual stickman – first the head with an oval shape, then the “skeleton” of the body with simple lines.
Step 2
In this step, we first mark the vertical and horizontal lines of the face. The horizontal lines show (from top to bottom):
Eye line (located near the center of the area);
The line of the nose;
Oral route.
Under the head draw the neck – long pillar. Under the neck outline the body, do not forget to focus on the line from the first step. Draw two circles for the shoulders. Draw the arms in the shape of an oblong cylinder and outline the hands. The lower part of the body is drawn as an inverted triangle. The legs should be drawn in the same way as the arms – in the shape of an elongated cylinder. And the last step of this step is to draw the foot and sketch the stick on Aang’s hand.
Step 3
Now it is a short step. Once you have completed all the preparations, you need to start adding details to Avatar Aang. We always start drawing from top to bottom and this phase of the tutorial will be no exception. Focus on the facial contours from the previous step, draw the main strokes and of course, don’t forget the arrow on the forehead.
Step 4
In this step, we will finish adding details to the face. Erase the guides from the face, draw the eyes. It should be something like our example:
Step 5
Okay, now let’s sketch Avatar Aang. The collar should not be snug against the neck – as you can see, there is a considerable gap between this part of the gown and the neck. The cloak itself will fall loosely. Use light and wavy lines to draw the cape.
In the same step, draw Avatar Aang’s pants. They should also be roomy, as should the top of Aang’s shirt.
Step 6
This step draws the hand-drawn Avatar gripping the stick (to learn more about the hand, visit the drawing lesson on how to draw hands). Then, circle the entire upper body with confident and precise lines, erasing all unnecessary guides. Also don’t forget to add some folds of the fabric.
Step 7
Draw similar actions with Avatar Aang’s lower body and legs. Delete the rule of the previous steps, clean the drawing, delete the principle and you should get something like our example:
Step 8
And we continue to draw Avatar Aang. In fact, the shadows in this step are very simple – they are presented by creating a layer of medium intensity. You can see them on our neck, under our collar, right on the sleeve, and in other areas. It’s best to first outline the shadow areas and then fill them, or rather to hatch into a single layer.


