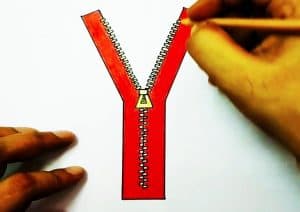
How to Draw a Zipper easy with this how-to video and step-by-step drawing instructions. Easy drawing tutorial for beginners and kids.

Please see the drawing tutorial in the video below
You can refer to the simple step-by-step drawing guide below
Step 1
First, let’s describe some auxiliary lines. Use straight lines that should be very light, almost transparent. Our zipper will be half open.
Step 2
Now describe the outer lines of the string. These lines must almost completely repeat the lines from the first stage.
Step 3
Now, depict a ribbon around the zipper chain. The lines should be light enough, as should the HTDraw.com artists in the artwork below.
Step 4
Now let’s make our zipper drawing interesting and aesthetically pleasing. To do this, describe a sequence and describe a series of short lines located at the same distance from each other.
Step 5
Now for the bottom line of the tutorial on how to draw a zipper. Describe a slider, as the HTDraw.com artists did in the image below.
Step 6
Now take an eraser and erase all the guides from the zipper drawing. Now mark the sketch with a pencil or darker ink, so that the zipper drawing is clearer and more realistic.
Step 7
Let’s paint the zipper. You can use gray, as in the examples from the artists of htdraw.com, or any other color.
If you’ve mastered these lines, chances are you’ve learned how to draw a zipper. Now, try to describe different cool clothes and add zippers from this article. Also, go to our category called Clothing to understand all the nuances of fashion design.


