Please see Turtle Shell drawing tutorial in the video below
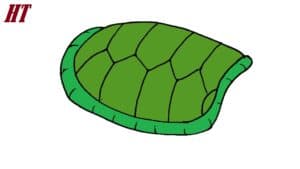
Here is a simple tutorial on how to draw a turtle shell step by step. I developed this lesson specifically for children and beginner artists, so the instructions are clear and easy to approach. You can easily cope with this task, even if you are new to drawing.
Turtle shell has a convex shape, consisting of a bony base and covered horns. For example, the shell reliably protects the turtle from all external influences, it protects the turtle’s body from mechanical damage and protects it from predators. The upper part of the case consists of several panels that form a beautiful pattern.
The skills you learn in this lesson are sure to come in handy in the future. When you learn how to draw a turtle shell, you can easily draw a turtle as well. So grab all the necessary art supplies and start following all the steps in this tutorial sequentially.
Turtle Shell Drawing Step by Step
Step 1. Draw the outer contour of the shell.
With the help of straight lines, draw an oval, the shape of which is the same as in the example.
Step 2. Sketch the bottom of the seashell.
Draw a smooth, curved line along the bottom border.
Step 3. Details below.
Take turns drawing short strokes along the bottom of the shell.
Step 4. Start drawing the horns.
Draw three large horns in a row in the upper part of the shell.
Step 5. Add the rest of the horns.
Draw multiple seams from the top fatal plates to the bottom of the shell.
Step 6. Color the drawing.
For coloring, you can use any shade of green.


