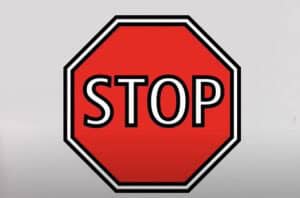
How to Draw a Stop Sign with this how-to video and step-by-step drawing instructions. Easy drawing tutorial for beginners and all.

Please see the drawing tutorial in the video below
With this step-by-step tutorial, you’ll learn how to draw a stop sign and use the skills you’ve learned to draw any other traffic sign drawing. I promise that this lesson will not be difficult for you, because it is designed for artists and beginner children.
A stop sign is a sign that tells motorists that they need to make a mandatory short stop before the edge of an intersection lane. Every driver must be able to distinguish between traffic signs and be sure to know the sign and function of a stop sign.
To draw this theme, you need to be able to draw straight lines, as well as write outlines of letters. Prepare the materials you need to draw a stop sign and start using this step-by-step guide soon.
Stop Sign Drawing Step by Step
Step 1. Start drawing the outside outline of the sign.
Draw the top of the sign’s outer outline using three identical lines.
Step 2. Add the bottom part of the outer path.
Below the three lines drawn earlier, draw five more of the same line.
Step 3. Start drawing the inside outline of the sign.
Inside the drawn octagon, add three more lines.
Step 4. Finish drawing the inner contour.
Add five lines inside the octagon.
Step 5. Start drawing the text.
Inside the smaller octagon drawn, draw an “S” on the left side.
Step 6. Add another letter.
Slightly to the right of the drawn “S” outline, add the outline of the “T”.
Step 7. Draw the outline of the next letter.
To the right of the outline the letter “T” drew, add the outline of the letter “O”.
Step 8. Sketch the last letter.
To the right of the outline of the letter “O”, you need to draw the outline of the letter “P”.
Step 9. Color the drawing.
Fill red inside the octagon, leaving the letters white.


