Cheese Drawing easy with this how-to video and step-by-step drawing instructions. Easy drawing tutorial for beginners nad kids.
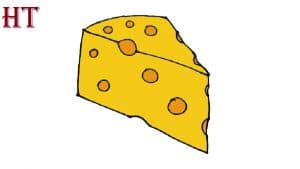
Please see the drawing tutorial in the video below
You can refer to the simple step-by-step drawing guide below
Step 1
Start by drawing a triangle. Each of the three sides should be of a different length, with the longest side at the bottom of the shape. This outlines the top of the triangular cheese wedge.
Step 2
Draw a line down from each bottom corner of the triangle. This outlines the sides of the cheese.
Step 3
Connect the vertical lines with another line. This fully outlines the shape of the cheese.
Step 4
Draw a small half circle along the bottom of the cheese. Erase the line, forming holes or air bubbles characteristic of some cheeses.
Step 5
Draw another half circle along the top of the cheese. Again, erase the line, make another hole.
Step 6
Draw a small circle on the face of the cheese, forming another hole.
Step 7
Draw another circle on the face of the cheese. Draw a diagonal curved line through each circle to give the hole a three-dimensional shape.
Step 8
Draw a circle on top of the cheese. Draw a curved line through it, forming another three-dimensional hole.
Step 9
Draw a half circle on the back of the cheese and erase the line below it. Draw two more circles of different sizes on the face of the cheese, with a curved line through each shape. Draw a curved line along the inside of the first half circle drawn, along the bottom of the cheese.
Step 10
Color your cheese. Will it be creamy white like Swiss cheese, bright orange like crisp cheese, yellow, red, or a combination of several colors? The choice is yours.
Rats are famous for eating cheese. Learn to draw a mouse or an entire meal using our handy drawing tutorials.


No Responses