How to draw a Space shuttle easy with this how-to video and step-by-step drawing instructions. Easy drawing tutorial for beginners and kids.
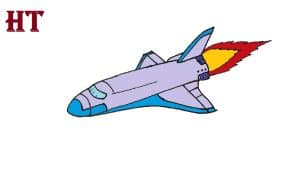
Please see the drawing tutorial in the video below
You can refer to the simple step-by-step drawing guide below
Step 1
Start by drawing a curve. Note that the overhang is in the sharpest curve of the line. This overhang is the cockpit of the space shuttle or the crew cabin. The forward curve outlines the bow cone of the shuttle and in the back is the top of the hull.
Step 2
Draw a curve below the first line. Let the line meet first at a circular point at the end of the nose cone. This forms the underside of the fuselage.
Step 3
Use a long curve to create an irregular shape in the back of the fuselage. The line must appear from the end of the original line. Note that the figure is not completely enclosed. This forms the ship’s fuel tanks.
Step 4
Use a series of curves to surround the back of the ship.
Step 5
Use a curve to surround the fuel tank, distinguishing it from the rest of the fuselage. Use a different curve to surround the back of the ship.
Step 6
Draw the posterior fin of the shuttle, called the vertical stabilizer. First, draw a curved triangle on top of the tank, erasing the guide lines if needed. Draw a downward curve in front of the fins and surround a curved rectangle to form the rudder. Then place another curved rectangle behind the fin, on top of the tank.
Step 7
View fuselage details. Wrap a large, curved rectangle on top of the fuselage. Draw a line the length of the rectangle, and strip it with perpendicular curves. This forms the loading ports of the cargo compartment. Next, wrap the nose cone with a series of curves. Note that a curve consists of a long line. Above the nose cone, draw a series of interconnected curved squares. Within each square, draw a smaller square. This forms the windows of the cockpit or crew compartment. In the end, draw a small square and circle next to the nose cone.
Step 8
Draw wings, erase guides as needed. Draw a curve down the side of the fuselage. Draw a line from one end and a long curve from the other, forming a triangle. Draw a narrow rectangle on the back of the wing, forming a plane. Wing detailing by a series of straight lines. Then, draw a small circular triangle that protrudes from the opposite side of the ship, forming the far wing. Detail it with lines.
Step 9
Draw the main propulsion. Extend a rectangle from the tank, erase the guide lines if needed. Use curve layers to form the main motor’s nozzle.
Step 10
Color your space shuttle. Most shuttles are white with black accents.
