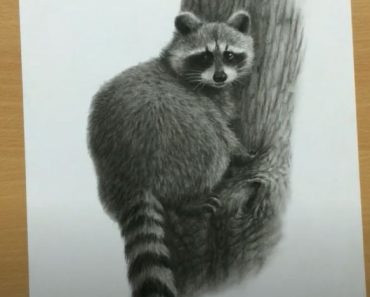
How To Draw A Sea Otter easy with this how-to video and step-by-step drawing instructions. How to draw cute animals for beginners and kids.

Please see the drawing tutorial in the video below
You can refer to the simple step-by-step drawing guide below
Step 1
We’ll start with the head and face for the first step of the tutorial on how to draw a sea otter.
To begin with, draw some curved lines to form the rounded outline of the otter’s head. This border will be broken up by some small, rounded ears at the top of the head and a protruding mouth at the bottom.
You can then use some rounded shapes for the eyes and the details of the eyes, then add contour for the mouth area.
Finally, draw the nose and add a smiley face underneath before moving on to the second step of the tutorial!
Step 2 – Now draw the body and arms of this sea otter
For the second step of this sea otters drawing, we will start with contouring the body and arms.
Use a curved line for the chest of the sea otter, and then use a slightly more curved line for the back.
Then draw the small arms pointing down near the center of the chest. They will also end up with some small pointed fingers, as shown in the reference image!
Once you are satisfied with the look and feel of these sections, we can move on to the fourth part of this tutorial.
Step 3 – Draw some more body parts and the start of the legs
Continuing with this sea otters tutorial, we will now draw some more bodies and legs.
The body of the sea otter is quite long and thin, so you need to be careful when stretching the lines for the sides of the body. The otter’s belly will also be outlined in this step.
Finally, draw thick and rounded upper thighs for the legs. We’ll finish this leg in the next step, so start that when you’re ready!
Step 4 – Next, draw the rest of the legs and tail
Before you move on to the final details of this sea otter drawing, we will first complete the legs and tail.
You drew thighs for this sea otter’s legs in the previous step, and in this step we’ll add paws to them.
The feet will be small with tiny rounded toes, so they should be pretty easy to add! After completing the legs, you can also add the tail for the otters.
This tail is relatively long, and it will thin out until it ends at the pointed end. Once it’s drawn, you’ll be ready for the final details!
Step 5 – Add the final details to your sea otter drawing
It’s almost time for the last step of this sea otters drawing tutorial, but first, we have some final points to add!
In our reference image you’ll see we used some bumpy lines to draw a small mound around the base of the sea otter it can stand on.
Once you’ve drawn the element, you can also draw some additions of your own!
For example, if you are going to paint the background, you can tell what environment this cute sea otter is in.
You can even add some sea otters to it along with or even add other animals like fish. These are just a few ideas, but what other additions can you think of to add to this image?
Step 6 – Finish your sea otters in color
Although we worked on a slightly cartoonish, stylized version of this animal for this sea otter drawing, we decided to keep the colors looking a bit more realistic and realistic.
We used various shades of brown for the sea otters’ fur, and for the belly we used some beige.
These colors are the ones you can use when coloring your own pictures, but there are many other colors you can use as well!
You can combine colors like black or yellow to keep the colors true, or you can take a great stylistic approach by using lighter colors.
Another way is to vary the art media and tools you use, so how would you complete this painting with color?
Your Sea Otter drawing is done!
This animal is one of the cutest creatures to find in the wild and we hope you had a great time creating this portrait during this how to draw sea otters tutorial!
When creating this tutorial, we didn’t just want to create a lovely picture to paint, but we also wanted to break it down in a way that makes it fun and easy to recreate.
Hopefully we have succeeded in all of these goals for you!
Completing this tutorial doesn’t have to be over as there are many ways you can keep the fun going!
Would you paint a fun background or maybe add some sea otters to hang out with this one? Any ideas on how to end this?
Another way to stay happy is to visit our website to see the great collection of drawing tutorials we have for you!
We also plan to upload new ones from time to time, so be sure to stay subscribed.
When you’re ready to show off your sea otters, you can share your finished work on our Facebook and Pinterest pages!
