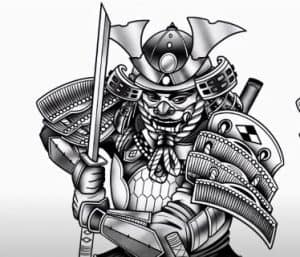
How to Draw a Samurai easy with this how-to video and step-by-step drawing instructions. How to draw for beginners and everyone.

Please see the drawing tutorial in the video below
You can refer to the simple step-by-step drawing guide below
Step 1
The first part of the lesson will be very simple, we will need to draw a samurai skeleton. We start it with an oval for the head and a simple line for the spine, on which we draw the chest and pelvis. Next, we outline the arms and legs using simple lines. At this step we need to press the pencil very weakly, because in the future all these lines will be erased.
Step 2
Now we outline two symmetrical lines of the face, intersecting in the center of the face, in the area of the bridge of the nose. Next, we outline the neck and torso. Then we sketch the legs and arms, they will be depicted using very simple geometrical shapes.
Step 3
Our Samurai wear head-to-toe armor, and it is this armor that we will draw now. Starting from scratch, we will sketch a helmet with giant horns. Then for the body, outline the armor using simple and gentle lines. On our hands, we sketch the sword and the cloak on the back.
Step 4
Now let’s start drawing details. Traditionally we’ll do this from the beginning and the end with the foot. Hence, gently draw the contours of his signature samurai helmet, long horns and a creepy mask on his face. You can draw a slightly different mask, as all the samurai wear quite different masks.
Step 5
Now let’s lower it a bit lower and carefully draw the shoulder elements of the armor. Then we draw the sleeves and arms, in which the sword will be clipped. Draw all the necessary lines and folds, delete the unnecessary instructions, and move on to step six of the lesson on how to draw a samurai in armor.
Step 6
So here we need to draw a sword, and to learn how to do it perfectly, visit our lesson on how to draw a katana. Now we go lower by carefully drawing the samurai belt, on which the pockets are placed. Next, draw the elements of the armor on the legs and loose pants.
Step 7
Now will probably be the simplest step of a lesson on how to draw a samurai wearing armor. Here we will need to draw the lower part of the legs and feet. Also here we will need to draw all necessary creases and remove all unnecessary guides from the samurai drawing.
Step 8
The armor-wearing samurai were almost drawn, and we just needed to make it more massive and realistic. To do this, we will draw the shadows using the classic hatching method. As you can see, the hatch windows here are located in the least illuminated areas of the samurai’s body, i.e. where the light doesn’t shine.
As you may know, we want to draw different warriors from different cultures and eras. In the category “People” on HTDraw.com you can find them all. But if you don’t find your favorite warrior there, remember to write us about it and we will give you the right drawing lessons.


