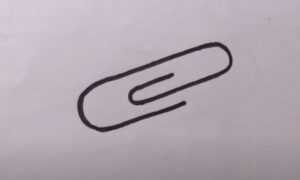
How to Draw a Paperclip with this how-to video and step by step drawing instructions. This easy paperclip lesson is perfect for younger students looking to get started with drawing.

Please see Paperclip drawing tutorial in the video below
You can refer to Paperclip simple step by step drawing guide below
Step 1. Start shaping the paperclip
Start by drawing a long spiral, this will be the starting point for our paperclip.
Step 2. Create the outer border of the paperclip
Next, draw a slightly larger spiral around the first shape, forming the outer outline of the paperclip.
Step 3. Add the end of the paperclip
Add the ends of the paper clip by drawing short curved lines at each end.
Step 4. Draw more paper clips
Now add additional paper clips by drawing two long spirals.
Step 5. Create the outer outline of the drawn paper clips
Then, create the overall outline of the drawn paper clips using the same steps as before.
Step 6. Complete the paperclip drawing
Let’s add some vibrant colors to make our paper clips stand out! Use red, pink, and blue pens to color the paper clip. Then add depth using a light gray pencil to create subtle shadows.


