How to Draw a Mountain Lion Easy with this how-to video and step-by-step drawing instructions. Learn to draw animals for kids and beginnes.
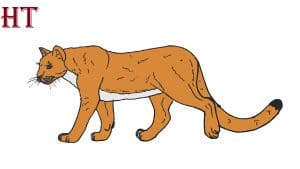
Please see the drawing tutorial in the video below
You can refer to the simple step-by-step drawing guide below
Step 1
Draw the outline of the head, ears (round and elongated) and strong neck.
Step 2
Add eyes, nose (draw nostrils), mouth and details to the ears.
Step 3
Draw shoulders, thick front legs, and large shins (five toes). Do not forget to draw the cracks from which the claws come out. Notice the anterior hump on the shoulder.
Step 4
Draw the rest of the body, the hind legs and tail long and thick. The hind feet have four toes. Cougars have the largest hind legs in the cat family by proportion, which allows them to be powerful leapers and sprinters.
Step 5
Add fur, muscle, beard and you’re done.
Step 6
Here are four additional sketches: two of the cougars in motion (first and fourth) and two static poses (second and third). When you’re drawing a cougar (and other similar animals), it’s helpful to keep two reference blocks: one for the shoulder (front leg) and one for the thigh (back leg). Rotating them, you can create various poses: walking, jumping, running, etc.
Step 7
Color the mountain lion you just drew.
