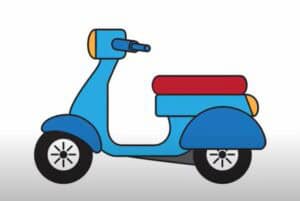
How to Draw a Moped with this how-to video and step-by-step drawing instructions. Learn to draw easy for beginners and kids.

Please see Moped drawing tutorial in the video below
In this tutorial I will show you how to draw a motorcycle. A motorbike is a vehicle with two wheels and an engine, like a motorbike but smaller. It usually has pedals, like a bicycle. This car is considered to be quite comfortable.
Historically, the word «motorcycle» was formed from the words «motor» and «pedal», so the first motorcycles were motorcycles with bicycle pedals. Today, most motorcycles are automatic, and they are often the first step in learning to ride a motorcycle.
Following the instructions, you will definitely be able to create an amazing motorcycle drawing.
Material:
- Pencil
- Paper
- Eraser
- coloring pages
Moped Drawing Step by Step
Step 1. Draw the outer contour of the wheel.
Start by drawing the wheel of the motorcycle. Draw them as two circles.
Step 2. Add the inside of the wheel.
Outline smaller circles inside the previously drawn circles.
Step 3. Draw the bottom contour of the motorcycle.
Visualize it as a long curve starting at the wheel of a motorcycle.
Step 4. Add the car head.
Draw a curved line connecting the wheel and bottom of the motorcycle.
Step 5. Add two elements.
Draw the motorcycle’s rudder and connect the motorcycle to the second wheel using straight lines.
Step 6. Sketch the seat of the motorcycle.
You can use one straight line and two curves to complete this step.
Step 7. Add motorcycle headlights.
Describe two ovals in the front and rear of the motorcycle.
Step 8. Check if the steps are correct.
Now you can look at the drawing and see if there is anything that needs to be fixed or removed.
Step 9. Color the drawing.
Use shades of blue, shades of gray and red to colorize this drawing.
The lesson is over and you can now draw a motorcycle. Hope you are satisfied with the results. Follow us on social networks.
You can see more:


