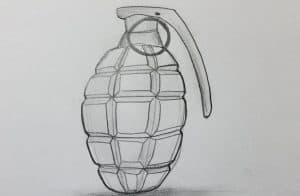
How to Draw a Grenade easy with this how-to video and step-by-step drawing instructions. Simple drawings step by step for beginners and for all.

Please see the drawing tutorial in the video below
You can refer to the simple step-by-step drawing guide below
Step 1
Using light lines outline the main contours of the grenade in the form of an oval with a flat top. By the way, to check the symmetry of the grenade sketch, put it on a mirror, and you will see the inaccuracies in the sketch.
Step 2
Now outline the safety lever and pull using smooth and light lines. Do not overdo it with the darkness of the lines, so that in the next stages we can make the necessary changes.
Step 3
On the body of the grenade draw Crossing lines, as in our example. To make the grenade look big and round, you have to make the squares in the middle larger than the tiles on the edges.
Step 4
Use clear lines to draw sections on the body of the grenade. It is very important to make all segments of the grenade as symmetrical as possible and to take into account perspective, so do not rush and draw everything neatly.
Step 5
Remove all unnecessary lines from the grenade body. Use clear lines to draw safety rings and levers. If you did everything right, then your grenade drawing should look like this.
Step 6
And in the last step of the art lesson on how to draw a grenade, we will still add shadows with the help of normal hatching operations.
This tutorial consists of extremely simple steps and we hope that you did not get stuck in this lesson. Important note – grenades come in all shapes and sizes, so try drawing other types of this weapon. And to not miss a new lesson on weapons or other items, follow our social media to follow all the updates and learn to draw with the .com team.


