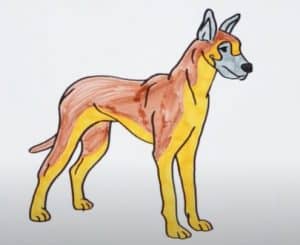
How To Draw A Great Dane Dog easy with this how-to video and step-by-step drawing instructions. Simple Dog drawing for beginners and everyone.

Please see the drawing tutorial in the video below
You can refer to the simple step-by-step drawing guide below
Step 1
Okay, let’s start this step by drawing a total of three circles. First will be for his head and then add the facial guides and the shape of the square jaw and muzzle shape. Next, draw another circle for his torso and then add another circle for the bottom end of this giant monster’s butt. You will then add all the chi guides for all four legs and finally his tail.
Step 2
So how are you doing so far? Sweet. You will now start sketching the Great Dane’s facial features. First, draw two long, slightly curved lines for the cut ears and then two small circles for the eyes. You will then add the shape of his jowls and then move down to start outlining the lower part of his body. Now that you’ve drawn some of the dog’s faces, you can start outlining the shape of the hind legs, lower belly, and then the front legs.
Step 3
Okay so far so good right? You are doing a good job, keep it up. You will now outline the thickness of the tail and then draw out the back shape of the Great Dane’s hind legs. Add some toes and then draw the shape of the front paws as shown to you here and you will end up giving the dog some nails.
Step 4
As you can see your dog is walking along nicely and guess what you did? You have reached the final drawing step. You’ll complete the dogs’ faces by drawing the top of their skulls slightly indented, then adding their innocent looking brows and eye color. Draw a line for the bridge of the nose then draw the tip of the nose yourself and add the nostrils. You will then complete the body lining and outline to some detailed definitions on the inner pins. Oh, before you go give him a pedicure and erase all the guides and shapes you drew in step one.
Step 5
Yes, you did it. You just finished this lesson on how to draw a Great Dane dog step by step. All you have to do now is color him/her and you are done. I hope you enjoyed this tutorial, I will be back with another tutorial shortly so you can continue this tutorial.


