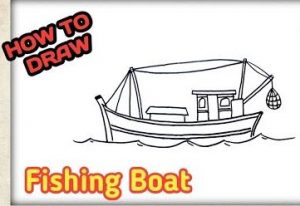
How to draw A Fishing Boat easy with this how-to video and step-by-step drawing instructions. Easy drawing tutorials for beginners and kids.

Please see the drawing tutorial in the video below
You can refer to the simple step-by-step drawing guide below
Step 1
Start with a gray pen and ruler and draw a line about an inch from the left side of the page, about an inch from the bottom. At the right end of this line, draw a slightly curved line down to the bottom right hand corner.
Step 2
Take a gray pencil and a drawing compass and draw three small circles to the right of the bottom part of the curve. Then add smaller circles inside each of these circles and end with a dot in the center of each circle.
Step 3
Use a gray pen and ruler to draw small horizontal lines connecting the vertices of each set of circles. On the right-hand side of the last circle, stretch the horizontal line out until almost the end of the page.
Step 4
Now bring another curve down towards the bottom of the page, descending from the bottom of the line on the right hand side. Go back to the first line you created and draw a diagonal line down to the bottom of the page.
Step 5
Now, add a horizontal line near the half of the shape. Do you see the outline of your fishing boat starting to take shape?
Step 6
Go back to the circles you created earlier. Move to the small horizontal line you made between the right circle and the center circle and draw a vertical line up from the center of this line, about 1 inch long. At the top, draw a horizontal line and add a parallel horizontal line just above. At the left end of these horizontal lines, add a small diagonal line that connects to the top of the boat.
Step 7
Use a gray pen to connect the ends of two parallel lines, then with a gray pencil and compass draw another small circle in the top left corner of the boat. Add a dot to the center of this one.
Step 8
Use the gray pen and ruler to create another horizontal line just below this circle, connecting to the circle to the left of the three shapes you created earlier.
Step 9
With the gray pen, fill in the “stripes” you just created.
Step 10
Take a red pen and use it to make a series of marks inside three small circles. Add set of parallel lines with 90 degree angles, all around the edge of each smaller circle.
Step 11
Now, use the red pen to create loops inside the smaller circles, leave the channels you just created blank, the circles are divided into 4 quadrants, with a space in the middle.
Step 12
Take a gray pen and use this to fill in the gaps in the center of the rings – these are lifelines for your fishing boat.
Step 13
Use the red pen to add a wavy line to the bottom of your boat…
Step 14
And fill in the bottom half of the boat with the same red pen.
Step 15
Use the gray pencil to fill in the top third on the left side…
Step 16
And using a black pen and ruler add two vertical lines, running parallel to each other, just above the lifeline on the left hand side.
Step 17
Connect the ends of these two lines with a curved line and fill in the center with a black pen.
Step 18
Now, use the black pen and ruler to draw another line to the left, this time horizontal, running parallel to the top of the boat.
Step 19
Connect the ends of these lines to the bottom of the boat with a short, vertical line, then add more vertical lines to create square sections along the length of the boat.
Step 20
Return to the central solid shape and add two rectangles, tilted at a 45-degree angle, to the edge of this shape.
Step 21
Fill these shapes with a black pen…
Step 22
Now, add two more vertical, parallel lines appearing from the top of the boat, past the top line, and add a short horizontal line to the right and a longer one to the left.
Step 23
Connect the ends of this line to the top of the boat and use the vertical lines to create the square sections, just like you did before.
Step 24
On the left handrail, add two parallel vertical lines…
Step 25
Connect them at the top, fill in the center with a black pen, then add a slight curve from the top.
Step 26
Add another vertical line, this time in between two parallel lines, extending to the top of the figure.
Step 27
Cross the top of this vertical line with a short horizontal line to create a cross. Then add a series of moving horizontal lines to connect the two vertical lines.
Step 28
Add another cross to the left of the drawing, emerging from the first set of balustrades.
Step 29
Now, add another line that appears from the top corner of the boat, facing out at a 45 degree angle towards the top right corner of the page. Just below this line, add another line that moves horizontally to the right side of the page.
Step 30
Use the gray pen to fill in the top of the boat…
Step 31
Use a black pen to connect the tops of the crosses together, then connect this to the end of the left handrail.
Step 32
Bring another line from the point of the second cross, down diagonally, and connect this line to the other. Then bring another line down in the opposite direction, connecting the point of the cross with the corner line to the right.
Step 33
Use the black pen and ruler to connect the line to the right end of the boat…
Step 34
Add another line to the left of this paragraph, connecting to the bottom of the boat, and then add two shorter lines to the left.
Step 35
Use the lines to create a triangle, attach to the top of the boat and link all the lines together.
Step 36
Now let’s add another, smaller triangle inside the larger one…
Step 37
And use the black pen to add curved lines across the triangle to complete the look.


