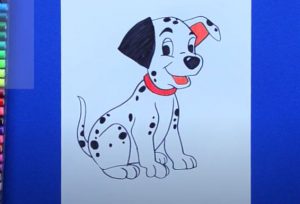
How to Draw a Dalmatian Dog easy with this how-to video and step-by-step drawing instructions. Dog drawing tutorial for beginners and everyone.

Please see the drawing tutorial in the video below
You can refer to the simple step-by-step drawing guide below
Step 1
Start this step by drawing out three circles of different sizes. The shape of the middle part is oval, and the back circle is like an egg. Then you’ll add face guides as well as leg and foot lines and shapes.
Step 2
As you can see, you will start with drawing the shape of the loose ears and then the starting lines for the bridge of the dog’s nose. Then add a line for the right side of his neck and let the line line vertically down to form his back and hind legs. Next draw the front leg lines and a bit of the ankle.
Step 3
You have reached step three and what you will do next is draw the thickness of the neck by adding the line on the left. Finish the toe lines first and then flex the foot along with the toe lines. You will finish this step by drawing the back end line hidden behind the front legs.
Step 4
You will now begin to outline the dog’s facial features. Start with the structural contours of the face, then the expressive lines for the eyebrows. Withdraw the nose including the nostrils. Take a detailed look at the muscular outline of the dog’s body, then draw the hind legs and paws.
Step 5
This is the step where you will draw out all the spotted shapes your dalmatian has marked. Of course, you can design your own label, which means you have to use your imagination. Erase the principles and shapes that you drew in step one to clean up your drawing.
Step 6
After you’re done, your dog will come out looking like the one you see here. All you have to do now is color in his spots and you’re done. I had fun showing you how to draw a dalmatian step by step.


