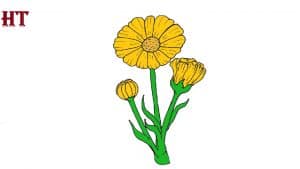
How to Draw a Daisy Flower with this how-to video and step-by-step drawing instructions. Flower drawing step by step for beginners and everyone.

Please see the drawing tutorial in the video below
You can refer to the simple step-by-step drawing guide below
Step 1
First we will draw the center of the flower. Don’t forget to leave enough space for the petals around the center and the stem below.
Step 2
Draw a long wavy line for the trunk. Draw four lines inside the circle to divide it into eight equal parts.
Step 3
Draw eight long ovals for the petals. Each petal starts where we draw the lines that divide the circle.
Step 4
Add another ring of petals. They are under the first petals and will be partially hidden.
Step 5
Delete the overlapping lines drawn in the previous step.
Step 6
Next, we’ll outline the leaves. Draw a straight line, leaning over the trunk. At the end, add shorter lines pointing down a corner. Draw an oval around the lines.
Step 7
Erase the inner lines from the leaf and center of the flower.
Step 8
Draw irregular, wavy lines around the leaf shapes for a more natural look. Also, draw lots of small, winding lines around the center of the flower.
Step 9
Delete the oval from the leaves. Wavy lines should only be left.
Step 10
Make the trunk thicker by drawing another line parallel to it. Add some details to the center of the flower; draw a crescent shape in the middle and surround it with many small dots.
Step 11
You can add some details to the flower before painting it. Add small U shapes inside the top of the petals and draw a few more petals with a slightly higher top from behind the other petals. You can also draw other floral patterns. Finally, let’s add some color to the flower


