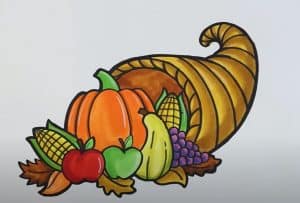
How to Draw a Cornucopia easy with this how-to video and step-by-step drawing instructions. Fruits drawing tutorial for beginners and kids.

Please see the drawing tutorial in the video below
You can refer to the simple step-by-step drawing guide below
Step 1
Start by drawing the outer edge of the basket opening. Use pairs of curves to enclose small, interconnected, two-pointed teardrop shapes. Use these to form a partial circle. This pattern gives the basket a woven shape.
Step 2
Use a series of overlapping curves to enclose the curled triangle of vision.
Step 3
This much horn requires many products. Start by drawing a pumpkin. Use overlapping curves to outline a quasi-circle. Draw the trunk upwards, using a curved rectangle. Make it appear three-dimensional by drawing a small oval at the top of the stem. Then, extend the curved lines outward from the base of the stem.
Step 4
Next, draw the ears of the corn. Use short, curved lines that join each other to outline the seashell shape. Then draw “C” shaped lines and scalloped lines across the corn to indicate the grains.
Step 5
Draw more fruit deeper inside the corn. Draw a bunch of grapes using small, overlapping circles. Sketch and detail another cob using scalloped lines. Use curved lines to partially enclose the circles, which can be any fruit you want. Finally draw the leaves. Some small leaves consist of only two curved lines that meet at one point, with a third indicating the veins. Others are pointed, outlined by short lines that meet at jagged points.
Step 6
Next, draw the fruit spilling out of the cob. Draw a bunch of grapes using the small circle, and another using the large circle. Draw the thorny vine leaves and detail them with a central and secondary veins.
Step 7
Next, draw an eggplant. Draw the body of the fruit using a curved line that doubles as itself. Enclose the left with a “W” shaped line. This starts with the sepals or green leaves on top of the eggplant. Use curved lines to enclose the calyx and stem.
Step 8
Fill in any remaining gaps with additional fruit. Surround a circular section to form an apple. Use two curved lines perpendicular to each other to form the trunk. Draw another thorny grape leaf.
Step 9
Basket detail and texture with overlapping curves.
Step 10
Color your cornucopia.


