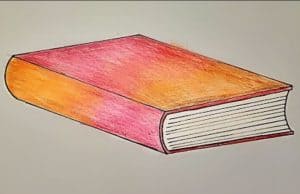
How to Draw a Closed Book easy with this how-to video and step-by-step drawing instructions. Easy drawing tutorial for beginners and kids.

Please see the drawing tutorial in the video below
You can refer to the simple step-by-step drawing guide below
Step 1
First, let’s draw a geometry like in our example. If you could draw this without a ruler, that would be great.
Step 2
Continue drawing the book. In this step, we add edges to the shape from the previous step to give the book a more three-dimensional look.
Step 3
In this step, the drawing will look more like a book. Draw out the spine of the book. At the top and bottom draw the cover with rounded corners.
Step 4
Remove all unnecessary instructions and the general outline of the book is ready. Note that you can leave the cover blank or add your own title or graphic.
Step 5
Use short lines to draw the panels between the cards. And now let’s make our book more realistic and add shadows.
We hope that this lesson has taught you how to draw a closed book. If you want more lessons on the same things, visit our lessons on candles or glasses. Alternatively, you can write the tutorial you want to see on our website and we’ll do it shortly.


