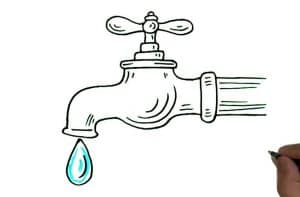
Hello everyone and welcome to HTDraw.com. We very rarely draw something about the interior of a house, and in this lesson we decided to revise it. So meet a drawing lesson on how to draw a faucet.

Please see the drawing tutorial in the video below
You can refer to the simple step-by-step drawing guide below
Step 1
Take a pencil and use long and slightly curved lines to start drawing the faucet. Norte that the lines should be very smooth and light.
Step 2
A very simple step where we need to draw the base of the faucet. In our example, we drew a short base, but you can draw a different shape.
Step 3
Move to the nozzle and draw the handle. Note that we drew a classic handle, but you can draw any other shape.
Step 4
The general shape of the faucet is ready. Use very clear and dark lines to draw out the faucet making it nice and smooth.
Step 5
Add some shadows and glare. To make the glare realistic, draw lines inside the contours.
It’s a drawing lesson on how to draw a faucet step by step. We drew a classic faucet in this drawing tutorial, but you can draw a faucet in any shape and with any handle. Don’t forget to share this lesson and subscribe to us on social media.


