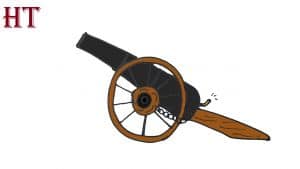
How To Draw A Cannon easy with this how-to video and step-by-step drawing instructions. Easy drawings for beginners and everyone.

Please see the drawing tutorial in the video below
You can refer to the simple step-by-step drawing guide below
Step 1
Start this first step by drawing a large circle for the wheel and then adding guides in the middle. Next draw the long lines of the barrel shaft on the sides and then create a curve for the chain. Once done, you can continue.
Step 2
In this next step, you will begin to detail the barrel as shown in the picture starting from the beginning. You have to make the tip of the cannon look like it has a hole. Draw a circle on the center part of the axle and then thicken the wheel by drawing another circle on the inner part of the wheel shape. Then you would draw two more circles for the solder part of the wheel that actually holds the cannon to the base. You will then draw the top of the wooden handle used to push the cannon along.
Step 3
This is step three and what you see is what you will do. So far the steps are pretty easy right? What you will do now is add the spokes to the wheel and then detail the inner cap of the wheel. The wooden handle detail will make the wood look like wood.
Step 4
Well, you are already in step four and with step four you will start to detail the center with the design you see here. Once done, you can start adding links for the chain and then draw the shape of the wick. See so far it’s pretty easy isn’t it.
Step 5
This is the final drawing step and what you will do now is detail the rest of the center cap and then complete the alignment lines as shown. Then you can start erasing all the principles and shapes that you drew in step one.
Step 6
This is what your cannon will appear after you finish. All you have to do now is color it and that’s it. You just finished this step by step tutorial on how to draw a cannon.


