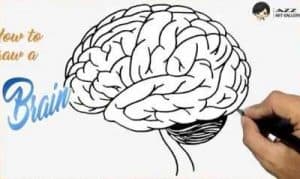
How to Draw A Brain easy with this how-to video and step-by-step drawing instructions. Drawing for beginners step by step

Please see the drawing tutorial in the video below
You can refer to the simple step-by-step drawing guide below
Step 1
We will draw some tutorial shapes to help you in the first step of the tutorial on how to draw a brain.
For this step you should use crayons now, as these shapes won’t be in the final image.
Using the reference image as a guide, you can draw two intersecting ovals.
The image below will be much smaller, and as you will see in the following steps, these shapes put together like this will help you form the shape of the brain.
Step 2 – Next, sketch your brain
Now that you have your pencil plan drawings, you can start sketching your brain at this step.
Using your planning shape and a reference image, carefully draw in the shape of the brain for the contour.
This can take a few tries to get it right, so I recommend still using a pencil for this stage. After it looks good to you, you can then rewrite it with a pen before erasing the pencil lines.
Step 3 – Now, start drawing the brain textures
The brain is very textured, as it has many wrinkles and folds to increase the surface area.
These details will probably be the most challenging to draw, so we will take it slow and add these details to your brain drawing piece by piece.
Using the reference image as a guide, carefully begin to draw the lines that will make up the folds of the brain. Now we will start from the left side of the brain and fill in that part.
Step 4 – Draw more brain folds
We will continue to add more folds and wrinkle textures in this step of the how to draw brain tutorial.
You can use a similar pattern when moving further to the right side of the brain. However, as you can see in the reference image, the distance between them gets a little wider the further you go.
Once you’ve filled out this section, we can move on to the next section!
Step 5 – Next, fill in the last wrinkles
You’ve really understood wrinkles at this point and there’s just a little more to go!
Carefully fill in the rest of the main part of the brain the same way you did before.
The section at the bottom should be blank for now, as we’ll fill it in for the next step.
Step 6 – Now, fill in the final details
You are almost done with the tutorial on how to draw a brain at this point! There’s just one more section at the bottom of the brain that we need to fill in.
This part is called the cerebellum, and it has a different shape from the rest of the brain structure. This part of the brain is made up of many small, thin lines.
This makes it look even more wrinkled than the rest of the brain.
When the cerebellum is pulled in, you’re almost done! If you’re feeling more creative, you can look up a slanted skull to draw around the brain!
What other fun ideas can you think of to complete this brain drawing?
Step 7 – Perfect your brain with some colors
That gives us the most fun of all: color in your drawing! The brain usually has a pink and purple palette, and that’s what we chose to color in our example.
However, you can also get creative with it and use your favorite colors to fill in your brain drawing!
You can even use some bright colors all over the brain to visually show that the brain is working hard on some great ideas!
Perhaps you could even draw a thought bubble forming from the brain to show what’s going on inside it.
We’re sure to see lots of creative interpretations of how to complete this brain drawing! You can also choose from several fun coloring media to perfect your drawing.
You can highlight and highlight with acrylic paints or crayons, or keep it sharper with watercolor paints or crayons. What do you think you will use?


