How to Draw a Bowling Pin with this how-to video and step-by-step drawing instructions. Children will enjoy designing their own bowling pin on paper. Also included is a downloadable version of this bowling pin drawing lesson.
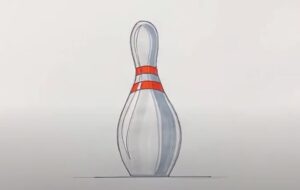
Please see Bowling Pin drawing tutorial in the video below
You can refer to Bowling Pin simple step-by-step drawing guide below
Step 1. Draw the head
First, draw a curved line to form the tip of the bowling pin.
Step 2. Attach the neck
Now, add two curved lines extending from the tip to draw the pin’s neck.
Step 3. Shape the belly of the pin
Next, form the belly of the bowling pin by drawing a curved shape that attaches to the neck.
Step 4. Draw the stripes
Draw three curved lines to add stripes on the neck of the bowling pin.
Step 5. Add pattern on the pin
Add a zigzag pattern on the bowling pin.
Step 6. Complete the Bowling Pin drawing
It’s time to grab your colored pencils and add some color to our drawing of a bowling pin! First, color the pattern on the pin with a red pencil. Then, fill in the rest of the pin with a white pencil.
