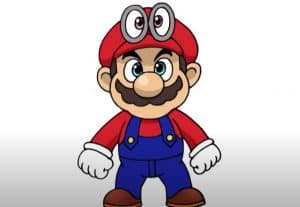
How to Draw Mario easy with this how-to video and step-by-step drawing instructions. Cartoon drawing tutorials for beginners and kids.
Please see the drawing tutorial in the video below
You can refer to the simple step-by-step drawing guide below
Step 1
In this first step, don’t let yourself start by drawing out the guides and shapes to form a nice solid frame for Mario. Start by drawing his head shape as an egg and then draw the guide lines on the face in front. Then draw the shape of his pot belly as you see here, a simple wide circle will do. Now draw the shapes of his arms and legs.
Step 2
Next in this step, you’ll start drawing Mario’s facial features. Using the face guides you drew in step 1, draw two oblong circles for his eyes, a big nose circle, two wing halves attached to the nose for a beautiful mustache, draw feathers his eyebrows and the shape of his ears. Next, start at the ear and make a line on his forehead for his hat, then go up and round it. Draw a circle as shown in the center of his hat, his icon will show. Now move up to his body and start drawing strings for his peasant pants. Next, draw and start shaping his glove as you can see here.
Step 3
Now in this step you will basically perfect his face. Draw his eyeball and shape the bottom half of his mustache as a continuous line of the letter “W”. Draw the other side of the hat on the right and finish his ears. Now draw a curved line right in the middle of his straps to separate the pants from the shirt and continue the separation on the right hand side where you will also draw the shape of his right arm. Give him a round button on his right strap and outline some lining details. Next, detail his gloves with a simple one-sided “M” on the right glove to create the shape of a closed fist. Otherwise, repeat the detail and draw out his left shoe.
Step 4
All you will be doing here is shading his pupils and detailing his hat a bit as shown. Draw the famous “M” in the center of his hat. Detail and shape his right glove a bit more and draw out and detail his right shoe. After you complete all the drawings and details, delete all the guides and shapes you drew in step 1.
Step 5
Ok guys, this is the final step to perfecting your Mario character. I know learning how to draw Mario can be an easy process by following these steps. Anyway, let’s work on the fields where Mario’s icon is located. Sketch the shoes and buttons for his overalls. Don’t forget to capture the lines for his pupils and sideburns. I hope you’re ready to see what your line art looks like.
Step 6
And this is what your Mario will look like when you’re done. Now you are ready to color him and send him on his next job. See that’s the easy way. That should do the trick for this step-by-step Super Mario drawing tutorial. I hope you all had fun.

