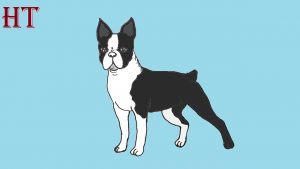
How to draw a Boston Terrier Dog easy with this how-to video and step-by-step drawing instructions. Dog drawing for beginners and everyone.

Please see the drawing tutorial in the video below
You can refer to the simple step-by-step drawing guide below
Step 1
Here’s a quick guide to the Boston terrier head. The first image is what the drawing will look like when finished, and the rest are step-by-step instructions for drawing a Boston terrier head.
Step 2
Now let’s draw this dog in the whole body. Start by creating three circles with the body being the largest. The only shapes that will connect are the body and the end. When you’re done, just add the face guides and continue to step two.
Step 3
Now you will begin to outline the structure of this dog’s head, which is very blocky and flat in the upper part. Once this is done, you can move on to step four to continue the momentum of drawing a Boston terrier.
Step 4
Now that the basics of the head are drawn, you can now start using the face guides to draw the eyes, nose, and tiny beads. Remember, the Boston terrier is bulldog blood, which means it has to be a bulldog as well.
Step 5
The color in the eye is the same but leaves some white. Once done, you can draw the marking lines that form the patch for the black head, with a white stripe in the middle. Add some whisker holes, and then draw wrinkles on the bridge of the dog’s nose. Finally, draw the lower jaw out and move it along.
Step 6
The Boston Terrier has such a strong looking body, which is why their neck is so long. Draw the neck, then draw in front of the chest and the length of the body. You will also need to draw the trimmed tail and some hind legs.
Step 7
Let’s start drawing the front leg, and then one of the back legs. As you can see, this dog is in the perfect show pose.
Step 8
Continue drawing the front pins until they are formed and complete. Once done, you can draw the rest of the chest and abdomen. Sketch on the inner back leg and then you’re ready for the next step.
Step 9
All you have to do here is complete the body by painting the toes and paws of the Boston terrier.
Step 10
Erase the guides and shapes that you drew in step one to clean up the drawing. When you’re done, you can start drawing marks on the shoulders and inner legs.
Step 11
This is what your new drawing will look like when you’re done. Now have fun coloring the dog, and if you do everything right, I’m sure you’ll have a great piece of art that will appear in your sketchbook along with other drawings that you’ll love. you have.


