Handshake Drawing with this how-to video and step-by-step drawing instructions. Easy drawing tutorial for beginners and all.

Please see Handshake drawing tutorial in the video below
Handshake Drawing step by step
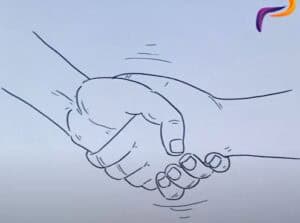
So with the help of this tutorial you will learn how to draw a handshake step by step. A handshake means greeting and gratitude, sometimes it means making an agreement or other agreement between people. Very often, the handshake is depicted on various icons and logos. In such cases, a handshake symbolizes peace and unity. Surely you have seen this icon many times.
You can easily draw a handshake if you carefully follow all the drawing steps. Each drawing step is a simple action. Shaking hands is described as two hands.
So, prepare all the necessary materials and start drawing the handshake step by step. Enjoy the drawing process!
Material
- Pencil
- Paper
- Eraser
- coloring pages
Step 1. Draw the upper contour of the thumb.
Draw a curved line to represent the two folds and rounded end of the thumb.
Step 2. Add the thumb rest and part of the seconds hand.
Draw a semicircle and from its center draw a line to represent the second finger.
Step 3. Draw the other fingers of the second hand.
Draw a few small semicircles and add a short straight line to the right.
Step 4. Add the fingers of the first hand.
Draw four elongated ovals placed side by side.
Step 5. Sketch the hand part.
On the left side of the figure depicts two curves above and below.
Step 6. Draw the cuffs.
Use some straight lines to describe the edges of the cuffs to the right and left.
Step 7. Color the drawing.
Use red and blue to color the clothes and use any color to paint the skin of the hands.
You can see more drawing:


