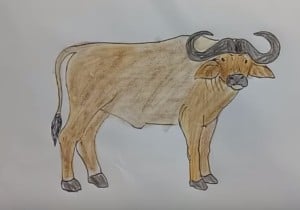
How to draw a Buffalo step by step easy for kids

In this quick tutorial you’ll learn how to draw an Buffalo in 8 easy steps – great for kids and novice artists.
Please see the detailed drawing tutorial in the video above.
Beginners can easily draw a buffalo through the steps below:
Step 1
Draw a buffalo! Start by detecting two long horned horns, bending towards each other. Continue with the rectangle ears. Here’s a tip: make sure the corners are not pointed but curved. End with face. Remember that lines are not straight
Step 2
Add two small circles to the eye, and two small dots for the nostrils. Then draw two wrinkles around the nose to outline the muzzle.
Step 3
Keep track of a line going through the back and curving down. Then draw a line from the front down. make up the body!
Step 4
From there, draw the first front leg, making it short and skinny. Draw a line across the bottom of the leg for the paw.
Step 5
Draw right at the bottom of the other front leg, as it looks out from behind the first. Pay attention to draw the foundation for the foot.
Step 6
Now, draw a line across the bottom for the belly and finish with the first hind leg.
Step 7
Last is the tail! Trace two lines curling up to create a short tail. Make sure the end is pointy! There’s your buffalo!
Step 8
So we finished painting the buffalo, you can color the snout, hooves, the tail in black, the rest color in brown.


5
4.5