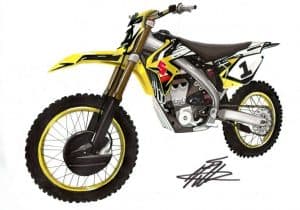
Dirt Bike Drawing easy with this how-to video and step-by-step drawing instructions. How to draw for beginners and everyone.

Please see the drawing tutorial in the video below
You can refer to the simple step-by-step drawing guide below
Step 1
Okay, as always, you’ll start this first step by drawing out the dirt bike instructions. Let’s start by drawing two horizontal lines for the top of the bike. Then draw a long “T” shaped line in front of the bike frame. Now what you can do is draw “Y” side lines which will eventually go up and around for the good wheel.
Step 2
In this step, you will draw out the tires, the front bar, the bottom half of the dirt bike’s structure, and the handlebars and the top half of the dirt bike like the saddle and others. When you draw the front and rear wheels, what you are actually doing is just drawing the rim and then the tires will be drawn in the next step. Take your time when drawing the rims on the bike, it will take you about 5-8 minutes to make.
Step 3
Now you are ready to draw the realistic body of the dirt bike. Start from the front part of the bike and start sketching out all the little details and definitions that come with drawing a dirt bike. The best way to attack this step is to zoom in on the image and follow the visual instructions. When taking out the tire, draw all the grooves that come with a mountain bike. Move on to the next step when you’re done.
Step 4
This step is very short and sweet. All you have to do is detail and identify all the hoses and pipes associated with a dirt bike’s engine. Once you’ve completed this step, you can go ahead and add some last-minute tweaks like a more detailed outline or arrangement of some lines. You know any touch at all. You can then delete all the guidelines and move on to the next step.
Step 5
This is what your finished bike will look like. Now if you notice, I didn’t color it, I just left it black and white. That means you can color them all yourself. Okay, that’s fun huh.


