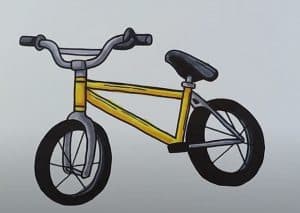
Bike Drawing easy with this how-to video and step-by-step drawing instructions. How to draw step by step for beginners and kids.

Please see the drawing tutorial in the video below
You can refer to the simple step-by-step drawing guide below
Step 1:
We will start drawing the bicycle by sketching a large circle on the left side of the paper. I would recommend using a compass for a perfect circle. Draw another circle inside it with a small gap between them. Then we’ll draw a few lines in the ring to make its wheel cables. Now we will draw the chain using a few circles and small lines to connect to the paddles.
Step 2:
In this 2nd step, we will use a compass to draw a few pairs of large and small circles, and we will draw some lines inside the circles to make the rim and axle of the bike. Using a few curves, we’ll outline a bike’s fender.
Step 3:
In this 3rd step, we will start outlining the frame of a bike using a ruler. We will draw two horizontal parallel lines and a few vertical and perpendicular lines to complete the structure. You can use the reference image for more and detailed instructions if you skip some steps.
Step 4:
In this step, we will draw the handle and the saddle to sit on. The reference image shows that we can create its handle using a few curves and center it using small rectangles and circles.
Step 5:
Finally, our bike drawing is ready for coloring. Typically, bicycles come in green, red, blue, black and white colors. Your kids can use bright and cheerful colors to make this drawing adorable and gorgeous to add to their collection books.
Last word:
So, I hope you enjoyed going through this guide. You are now very well aware of bicycle drawings. You are now completely dependent on your efforts on the sheet. Using color, artistic media and additional details will enhance your drawing expertise. Drawing is an engaging and quality time-consuming activity. So keep drawing your pages and visit our website for easy drawing tutorials.


