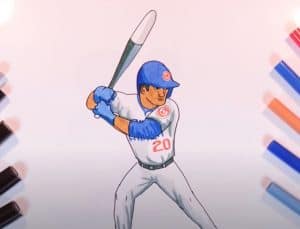
Baseball Player Drawing easy with this how-to video and step-by-step drawing instructions. Drawing jobs for beginners and eveyone.

Please see the drawing tutorial in the video below
You can refer to the simple step-by-step drawing guide below
Step 1
Okay, let’s start this first step by drawing out the guidelines and shapes for the baseball player. Start with a circle for the head and then draw out the shape and outline of the jaw and chin. You will then draw out the shape of the torso and then the chi instructions for the arms, legs, and feet. Make sure you add the shapes of the feet and hands.
Step 2
You will draw the lining of his baseball cap and then add some details to the nose. Once done, you’ll draw out the shape of the arms and then outline the creases of the shirt and legs. Once you’re done, you’ll move on to the next step.
Step 3
In this next step you will draw and detail the baseball cap and then start sketching some of the creases and folds on his shirt. Give this ball player some fingers and then shape the baseball player’s legs and socks and feet as shown.
Step 4
Okay, now you are on the fourth step and what you are going to do here is draw the shape of the bat and then add the detailed lines of the belt. Add some creases or creases in the pants on his upper thighs and then complete the shape of his lower leg.
Step 5
This is what your final step will look like when you’ve finished erasing all the guides and shapes that you drew in step one. I hope you learned something new with this step by step tutorial on how to draw a baseball player.
Step 6
This step is called the trick step. These little tidbits will guide you in creating better images. In this case, we’re going to tackle the real problem of flexibility to make your baseball player pop off its page. To do this, study the path of the arrows. These arrows will guide you to make its twist-like body.


