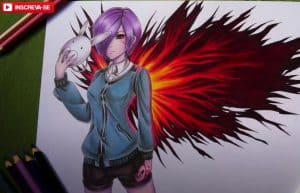
How to Draw Touka Kirishima easy with this how-to video and step-by-step drawing instructions. Anime girl drawing tutorial for beginners and everyone.

Please see the drawing tutorial in the video below
You can refer to the simple step-by-step drawing guide below
Step 1
First, we sketched out the basics of the character Touka Kirishima. We will use stickman for this. We see our figure as a teenager. The right shoulder is slightly wider than the head. Don’t forget that we are drawing a girl. In female form, the pelvis should be wider than the chest.
Step 2
Okay, first we’ll work inside the head’s contour. We draw two lines that intersect the center of the face. Then we outline the neck as an elongated cylinder.
Next, we outline a body, which is a bit tapered at the waist and extends to the hips. Also, in this step, we outline thin and graceful arms and legs.
Step 3
Now please describe in detail. First draw the contours of a short hairstyle. On the horizontal line, draw an eye and an eyebrow. Then we outline a small nose and lips like two short dashes. Next, using smooth lines, draw the details from the previous step. And at the end of this step we sketch the details of the bodywear.
Step 4
We’ll just draw the final details starting from this step. So we draw our Touka Kirishima’s hair. Then we outline the contours of the face. Draw eyes with pupils, eyebrows, nose, and lips. By the way, don’t forget to check out our drawing tutorials on how to draw Eren Yeager from Attack on Titan. It will help you to draw anime style face. Don’t forget to remove all the unnecessary instructions from your head.
Step 5
In this step we will work with the clothes that lie on top of the body. We can see a tight vest. Under this vest is a fairly thin fabric shirt. So we draw the pocket and the contour lies inside the vest border. On the shirt, we denote a high collar and some buttons located in the throat area.
Step 6
Time to draw the arms in the final details. Hand drawn shirt and palms open with clear lines as you can see in our picture. When drawing the arm, consider all the fabric creases. Also, be careful when you draw palms. Don’t forget to read a special post on how to draw hands and fists (it’s really not that easy in drawing).
Step 7
We continue to draw Touka Kirishima. Let’s start working on our anime character’s feet and boots. So we draw the final contours of the legs with the help of dark and curved lines. Draw the knee joint on the leg and the outline of the shoe. Don’t forget to outline a few creases.
Step 8
We’ve got the final step, and it’s time to work with the shadow on the Touka Kirishima drawing. In the manga, you can see shadows and contrasts. But in this lesson, we’ll use a slightly different way of working with shadows. First, we will define the light source, then using light expansion mode, we add shadows to areas where the light does not penetrate.
It’s another anime drawing tutorial that we in the simplest way tried to show you how to draw Touka Kirishima. We are not an anime drawing site. We have as many parts as you can see. However, we really love anime and try to promote it. If you like it, write about it in the comments so we know our readers support us.


