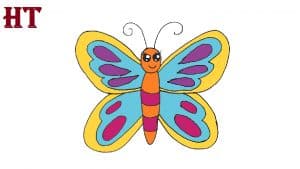
Butterfly to Draw so Cute for Kids with this how-to video and step-by-step drawing instructions. How to draw a Butterfly for Beginners and everyone.

Please see the drawing tutorial in the video below
You can refer to the simple step-by-step drawing guide below
Step 1
Start by drawing two ovals, one on top of each other. They form the head and chest or the middle part of the butterfly.
Step 2
Draw two overlapping large circles that also overlap the small oval. Delete as needed. They form the butterfly’s eye. Below the chest stretch a pair of curves that meet at one point. This forms the butterfly’s belly.
Step 3
Draw the first outline of the butterfly’s wings. From the chest, stretches a long and curvy. Connect it to the chest again, enclosing a large, irregular shape.
Step 4
Use a wide “U” shaped line to surround the lower wing. It should connect to the upper part of the abdomen on one side and the lower part of the front wing on the other. Then, paint small circles in the eyes to denote the pupils. You can leave a small invisible circle in each pupil to give the butterfly life.
Step 5
Extend a long, curved line on the opposite side of the ribcage to hide the irregular shape of the other anterior wing. Then draw two curves emerging from between the eyes. These are the antennae of the butterfly.
Step 6
Use a wide “U” shaped line to track the rest of the lower wing. Then, start decorating the front wings. At the ends of each wing, there is a small oval inside a larger oval. This is the eye of the butterfly. They are called eye spots because they look like a large pair of eyes. When the butterfly opens its wings, predators may scare away, thinking that the butterfly is the face of a larger animal!
Step 7
Color your animated butterfly. For our example, we chose subtle shades of pink and purple. In nature, butterflies are usually marked with black, brown, yellow, white, cream, green, orange, and blue.


