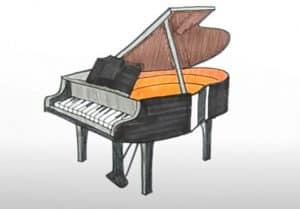
How to Draw a Piano easy with this how-to video and step-by-step drawing instructions. Easy drawing tutorial for beginners and kids.

Please see the drawing tutorial in the video below
You can refer to the simple step-by-step drawing guide below
Step 1
Interior sketch of the open piano. Use lines to outline the three sides of a rectangle. Connect the open surface with a pair of curves, one longer than the other.
Step 2
Adds three dimensional depth to the interior of the piano. Use straight and curved lines to draw a slightly smaller shape parallel to the first one. Then, draw lines parallel to the two sides of this shape.
Step 3
Draw the lid or lid of the piano. Use straight and curved lines to draw a shape that reflects the first shape. Then, draw lines parallel to its two straight sides. Connect them on all three corners using short lines. Then sketch the side of the piano. Use line segments to outline the rectangle. Note the “notch” away from the narrow end of the rectangle.
Step 4
Draw the front of the piano and the keyboard. Use lines to outline the rectangles. Then draw additional lines through the front and let the “L” shaped lines on the sides. Draw a narrow rectangle inside a rectangle on the front of the piano.
Step 5
View details of the keys. Draw lines on the keyboard. Corner the lines and continue them vertically on the narrow front of the keyboard.
Step 6
Draw black keys. Place narrow rectangles over the existing keys.
Step 7
Remove the support cover. Stretch a line from the corner of the piano to the lid and fold itself in half. Note the wavy parts of the lines.
tep 8
Draw the legs of the piano. From each of the three visible angles, extend a curve. Duplicate the line back to itself.
Step 9
Pedal drawing. Spread two pairs of curves below the keyboard. Paste a rectangle below them. Draw lines parallel to its two sides to create a three-dimensional shape.
Step 10
Coloring your piano. Pianos like these are usually black, brown, or white.


