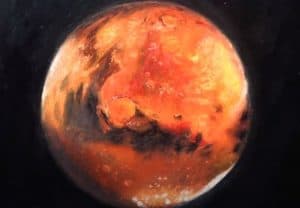
How to Paint Mars easy with this how-to video and step-by-step painting instructions. Easy Painting tutorial for beginners and kids.

Please see the painting tutorial in the video below
You can refer to the simple step-by-step painting guide below
In order for the drawing to be perfect we should use pencil to sketch it first, follow these steps:
Step 1
Start off by drawing a circle. Erase parts of the circle and replace them with weird convex convex curves. This outlines the craters on the planet’s surface.
Step 2
Draw another crater. Use overlapping curves to outline a circle. Create another round layer around these lines and another layer. Draw short curves that descend from the crater.
Step 3
Draw a second crater. Again, draw curve layers to outline an irregular circular shape. Draw short lines outside the crater. Note that these lines run in the opposite direction of the other crater.
Step 4
Draw some smaller, simpler craters, with two curves outlining the rounded depressions. Draw short descending lines from some of these craters. Fill one of the craters on the contour of the planet this way.
Step 5
Overlay irregular shapes and draw wavy, curved lines on the planet’s surface. This adds texture to the planet.
Step 6
Draw more circles and curves on the surface of the planet.
Step 7
View in detail one of the craters on the contour of the planet. Then draw wavy lines around it.
Step 8
Draw more wavy lines and rounded objects to give the surface texture. Fill the remaining areas of the planet with ovals and lines.
Step 10
Color planet Mars. Mars is dubbed the “Red Planet” due to its rusty red color. We use red to mix brown and around us use black. Please refer to the above video for instructions.


