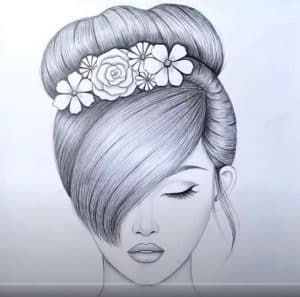
How to draw a girl with BEAUTIFUL hair style with this how-to video and step-by-step drawing instructions. Pencil drawing tutorial for beginners and everyone.

Please see the drawing tutorial in the video below
You can refer to the simple step-by-step drawing guide below
Step 1 – Draw the female head
To help you ensure that both sides of the head will be the same width and the facial features in the following steps will be equidistant from each other starting your drawing by first creating a vertical line in the middle of the area. your drawing area. Next, draw a circle for the top of the head and from that project, the first two lines go to the jaw area and then bend in and go down again at a sharper angle to finally form. curve of chin.
Since this is a female face for the purpose of this tutorial, we will make the chin quite small and narrow.
Step 2 – Refine the shape of the head
For this step, you can slightly adjust the shape of the top of the head as it usually won’t be the perfect half circle. You can also add a hint of cheekbones.
After you’re done with the people you can go ahead and delete the circle guide but leave the middle line.
Step 3 – Evaluate faces
To create instructions for the first set of face features, divide the face into four sections with horizontal lines. You will want to draw lines from the hairline area of the head (located slightly below the top of the head) to the bottom of the chin in such a way that you will have three evenly spaced parts of the face plus a smaller hairline out of a total of four. .
Step 4 – Place the eyebrows
Sketch the eyebrow just below the second line from the top of the head (the line behind the hairline).
Step 5 – Set the nose
Drawing the nose starts near the inner tip of the eyebrow. For the initial sketch, simplify the nose into planes for the front, side and bottom.
The nose will narrow towards the bridge and extend from there to the bottom of the face.
Please note that the nose is a facial trait that can vary greatly from person to person. An average nose like the one in this guide will usually go through the middle of three even parts. Longer noses can go further.
Step 6 – Put Ear
Draw the contour of the ear inside the middle of the three equally spaced sections touching the second and third lines from the top down.
Step 7 – Place the eye
Draw another horizontal line directly over the middle of the head (you can remove the other horizontal line at this point) and on it draw the shape of the eye (just the border). Keep your eyes far enough away so that you can put another eye between them. The space on both sides of the eye should be slightly smaller than the width of one eye.
Step 8 – Place the mouth
Position the mouth by first drawing a horizontal line between the bottom of the nose and the bottom of the chin. This line will represent the bottom of the lower lip. Going up from there draw a horizontal line for the mouth and another line above for the top of the upper lip. The lower lip tends to be bigger than the head so balance your drawing.
Step 9 – Draw facial features
Inside the shape of the eyes sketched in the previous steps, draw circles of the iris with the top slightly obscured by the eyelids and the lower part just touching the lower eyelids.
Please note that larger eyes can make for a more youthful and feminine look.
Step 10 – Draw the outline of the hair
The way you draw hair will vary based on the hairstyle. For this particular example, the hair will basically be divided into two main shapes going from the parting line. When multiple hairs are flipped to the left of the drawing, that shape will be larger than the right one.
Step 11 – Drawing hair details
To add details to the hair drawn in several flows from the parting line along the shape of the hair. Add in some other lines still in the general direction of the hair in different places along the overall shape of the hair. Try and change these things according to their length and distance to each other.
After you finish the hair, the tutorial is pretty much but if you want to add some lashes, you can follow the steps below.
Step 12 – Draw eyelashes
Draw the individual hairs of the lashes with slightly different distances between each hair but at the same time try and make the overall distribution evenly. Eyelashes tend to grow more towards the outer half of the eye (away from the middle of the road). The hairs of the eyelashes are coming out in the curved shape of the eyelids. The lashes themselves are also curled, but this will be less obvious for eyelashes that are directed at the viewer.


what is the song playing in the background for the drawing