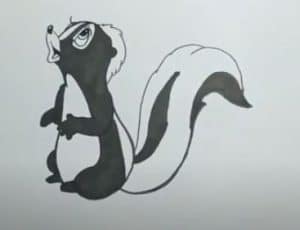
How to Draw a Skunk easy with this how-to video and step-by-step drawing instructions. Easy animals to draw so cute for beginners and kids.

Please see the drawing tutorial in the video below
You can refer to the simple step-by-step drawing guide below
Step 1
Start off by drawing a circle. This will be the basis of the skunk head.
Step 2
Use curves to detail the contours of the face. This includes ears and inner details, cheeks, nose, mouth open, cheeks and opposite ears.
Step 3
Erase the guide lines of the original circle, leaving a clear outline on the skunk’s face.
Step 4
Stretched in a long curve from ear to nose. Then stretch a series of curves that meet at jagged points from the ear. Allow this series of lines to meet the previous line at one point, forming a stripe running across the skunk’s face. From the back of the stripe extend a pair of different seams that meet at the serrated points. Allow them to meet at a point near the front of the stripe.
Step 5
Use the curves to outline the skunk’s forearms, flexing at the elbows. Loop your fingers and hands using narrow “U”-shaped lines.
Step 6
Stretch the three curves down from the hands, forming light under the belly and hips far away.
Step 7
Use a long curve to draw the skunk’s back and face. At the bottom, draw a series of “U”-shaped lines that overlap to form feet and toes. Above the foot, use a “C” shaped line to form the leg, bent at the knee. Use overlapping “U”-shaped lines to draw the other foot.
Step 8
Draw the tail, using a series of curves that meet at jagged points. Extend another pair of serrated lines down the center of the tail, creating a stripe.
Step 9
View details of the skunk’s face. Draw the eyes, using four consecutive circles and smaller ovals for each one. Shade between the two smallest to refer to the pupils. Contour the eye with curves above and below. Use a wide line to form the brow, and differentiate the tongue inside the mouth by using a short line.
Step 10
Color your skunk. In nature, skunk is black with a white stripe.


