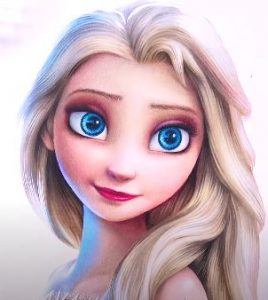
How to draw Elsa from Disney movie Frozen 2 with this how-to video and step-by-step drawing instructions. Pencil drawing tutorial for beginners and everyone.

Please see the drawing tutorial in the video below
Please see the drawing tutorial in the video below
If you are not confident enough to draw like a tutorial video, you can perform the character sketching steps first:
Step 1
Start by drawing two slightly curved curves.
Step 2
Connect the lines at each end with a curve.
Step 3
Create Elsa’s ear in a curve, almost surrounding an oval. Use a long curve to draw her chin.
Step 4
Delete the path from the middle of the face.
Step 5
Elsa in Frozen 2 we draw her hair down.
Step 6
Draw lots of wavy hair lines. Allow some lines to meet other lines in a sharp point.
Step 7
Surround her hair area using curves to connect the drawing people. Continue the curves on the far side of the face.
Step 8
Add more details and depth to your hair by drawing a few more short curves. Allow two lines to meet at a curved point on the forehead, forming a lock of hair.
Step 9
Delete the guidelines from the hair. Add details by drawing wavy lines, curling along the length of the curls. Draw a series of lines that meet at a point in front of your ears.
Step 10
Draw the neck with two almost parallel curves that flare at the bottom.
Step 11
From the left side of the neck, draw two almost parallel lines, slightly curved to form Elsa’s arm.
Step 12
Draw Elsa’s torso by extending a curve down from the right shoulder. Add the details of her dress by drawing a curve from shoulder to shoulder, allowing it to dip and form a point just before meeting the right shoulder. Extend another curve from the arm to the opposite side of the shape. Draw another curve slightly stretched downwards from the last line.
Step 13
Draw Elsa’s braids. Start by extending a long curve from the back of your head to the base of your neck. After that, use a series of overlapping curves to form the shoulder and the front of the torso. Allow some lines to meet at the point.
Step 14
Use the curves to complete the shoulder-length braids. Add details by drawing some short, curved lines that run along the length of each braid.
Step 15
To draw Elsa’s eyes, start by drawing two irregular egg shapes to a blunt point near the center of the face. On each eye, draw an eyebrow using two curves. The eyebrow lines will meet at a sharp point on the outside of the face, and a blunt point inward.
Step 16
Detail the inner ear using a curve. To draw the mouth, start with a curve. Draw a wavy line above and a curved line below to form lips. Draw a short line under the mouth to indicate the dimples of the chin.
Step 17
Draw an oval in the inner part of each eye. Draw a diagonal curve across the eye, just above the oval. Draw a few jagged spots above this line to make eyelashes. Make eyelashes shine.
Step 18
Draw the nose with at least four curves. In each eye, draw another oval. Draw two smaller ovals in each. Shadows the area between the larger and smaller oval.
Step 19
Draw a series of irregular squares and rectangles to detail the front of the dress. Draw small stars and a flower in the braid.
Step 20
Coloring your drawings. Elsa is often painted with blonde hair, pink lips, pale skin and a blue cape.


can you send me the picture of elsa picture you have drawn to me , it is really superb , i like it very much , can you send the pic to me