How to Draw a Collared Shirt with this how-to video and step-by-step drawing instructions. Undoubtedly, this lesson will be useful for you.

Please see Collared Shirt drawing tutorial in the video below
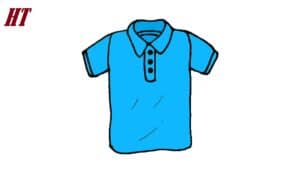
I suggest you complete a new lesson on drawing clothes, and now you will learn how to draw a collared shirt. In this lesson, you will gain useful skills and be able to apply them in the future when you want to draw a human figure in such an outfit.
Above is a men’s shirt with a collar and short sleeves. Front buttoned shirt. This model is very popular and looks stylish.
Collared shirts can be worn on a hot summer day for a walk or even to work. For coloring, you can use the same color as in the example or you can choose any other shade of your choice.
Collared Shirt Drawing Step by Step
Step 1. Draw the main outline.
Determine the size of the drawing and draw a rectangle.
Step 1. Draw the sleeves.
On each side, draw short sleeves, while maintaining symmetry.
Step 2. Add the edges of the sleeves.
Describe small stripes on each sleeve.
Step 3. Sketch the collar.
Using a few smooth lines, draw the collar in the same shape as in the example.
Step 4. Start drawing the lanyard.
Draw a straight line from the collar down and add another thin vertical line next to it.
Step 5. Add the buttons and the inner border of the collar.
Draw two circles to represent the buttons and draw two lines on the collar.
Step 6. Correct the inaccuracies.
Remove all unnecessary lines and make the border clearer.
Step 7. Color the collared shirt.
Use bright blue or any color of your choice.


