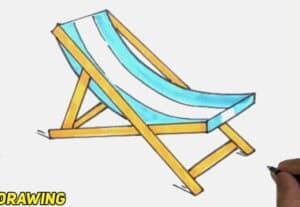
How to Draw a Beach Chair with this how-to video and step-by-step drawing instructions. Learn to drawing easy for beginners and kids.

Please see Beach Chair drawing tutorial in the video below
In this tutorial you will be able to learn how to draw a beach chair step by step. You can also add this while painting any beach landscape.
So the skills you learn in this lesson will be useful to you in the future. I am sure that this lesson will be very interesting and easy for you.
So you can see beach chairs many times during your vacation at sea. This is a very useful item to sit on the beach and enjoy the beautiful scenery.
In this tutorial, you will draw an armchair using straight and curved lines. You don’t have to be a professional artist to make this work, I created this tutorial especially for beginners and kids.
Beach Chair Drawing Stepb y Step
Step 1. Start drawing the top of the chair.
Draw two parallel horizontal lines and connect them with a short line.
Step 2. Add the right design.
Draw two straight diagonal lines and connect them at the top with a short curved line.
Step 3. Draw an outline of the structure on the left.
Draw a straight, curved line near the previously drawn horizontal bar.
Step 4. Start drawing the bottom of the chair.
On the right side, add diagonally slanted lines and join their edges.
Step 5. Describe the horizontal bar at the bottom.
Connect the previously drawn lines with two horizontal lines and a circle.
Step 6. Add the contour of the chair.
Connect the previously drawn structures with a curved line.
Step 7. Draw the outline of the structure on the left.
Add two curved lines next to the previously drawn contour of the chair.
Step 8. Finish drawing the left structure.
You need to add two more lines below the seat of the beach chair.
Step 9. Color the drawing.
To color this drawing, use yellow and navy.


