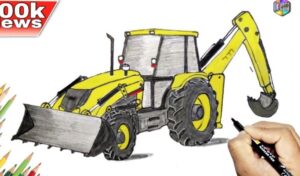
I suggest you complete a lesson in which you will learn how to draw a bulldozer. This lesson will be very useful for beginner artists.

So I am happy to give you a drawing lesson in which I will tell and show you how to draw a bulldozer step by step. With the help of this drawing lesson, you will practice drawing different geometric shapes. If you want your drawing to be more beautiful and complete, you can use a ruler and compass as needed.
A bulldozer is an earthmoving machine that is able to move independently and efficiently excavate soil or other rock. The configuration of the bulldozer is quite simple and easy to understand.
Its main body is a tractor, which combines a powerful chassis and a controlled cockpit. The main working part of the bulldozer is presented in the form of a movable bucket.
Material:
- Pencil
- Paper
- Eraser
- coloring pages
Please see the drawing tutorial in the video below
You can refer to the simple step-by-step drawing guide below
Step 1
Start by drawing the instructions for the cockpit or the housing for your bulldozer.
Step 2
Here we will draw the dump bucket for the bulldozer. Dump buckets are not only used to collect soil and gravel, they are also used to tear up foliage, hills and move heavy debris. Once the outline for your crate is drawn, go to step three.
Step 3
Next, you will now create the edges of the crate to close the edges. When finished, draw the bottom of the bucket slightly curved up and have four large square teeth. These teeth are used to rip through the earth and grapple with difficult tasks.
Step 4
You will draw the pistons connected to the bucket on either side, then draw the large donut-shaped tire in.
Step 5
On the other side, you will draw the bottom of the opposite tire, then add deep lines along the surface of the tire. Next, draw the tire guard or shield like that, and then draw below the bulldozer cabin is a small ladder for the operator to get up and down the cabin.
Step 6
Here you will draw the back of the bulldozer. This should include the tire shield, the tire, and then the threads on the tire. Also add some rough details along the torn walls.
Step 7
Now we will start drawing the cabin of such bulldozer. This part of the lesson will take about ten minutes to work through. It’s not as easy as the previous steps, but it’s completely doable.
Step 8
Determine the box shape of such cab. The lines should be pretty straight.
Step 9
Finally, add the frame around the top of the cabin, then add the rearview mirror, doors, and glass. Then you can start clearing all the errors and tutorials.
Step 10
Here’s the line art when you’re done. You can now color your bulldozer with a typical yellow color.


