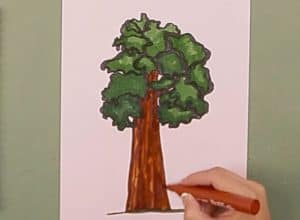
How to Draw a Redwood Tree easy with this how-to video and step-by-step drawing instructions. Tree drawing tutorial for beginners and kids.

Please see the drawing tutorial in the video below
You can refer to the simple step-by-step drawing guide below
Step 1:
First, draw the trunk. Draw a long diagonal line towards the center but leave a small gap at the top. Leave some space and draw another oblique line going towards the center on the right side. Leave a small space on this line towards the middle.
Step 2:
Next, draw your tree roots. At the bottom of your trunk, draw a few small oblique lines going away from your tree. Do the same on the right side of your trunk. Draw a straight horizontal line to connect your roots but draw two diagonal lines spaced apart in the middle to form one large root.
Step 3:
Then draw the branches and add details to your trunk. Draw two lines spaced out from the space you’ve left in the trunk on the left side. Do the same for the space you left on the right side. These are your branches. Now add a few small wavy lines going up and down your trunk for more detail.
Step 4:
Now draw the outline of the leaves. At the end of your two branches, draw a medium-sided circle using zigzag lines instead of just a straight line. Draw three more of these zigzag circles at the top of your trunk. Now draw a zigzag triangle on top of your three zigzag circles.
Step 5:
To finish, draw your leaves. Inside the outline of your leaves, draw a few small lines in all directions to show the leaves.
Interesting facts about redwood trees
Redwoods are the big trees in the tree world. They grow to 375 feet tall! The trees were found in the US state of California by early settlers. The forests quickly became endangered when the logging business moved in and began cutting down the giants to build houses and furniture. Today the tree is protected by law in the national park. Visitors from all over the world flock to the giant trees that can dig caves to make tunnels.


