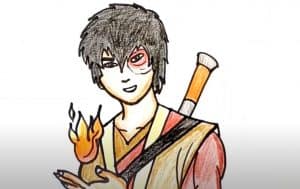
How To Draw ZUKO from Avatar The Last Air Bender with this how-to video and step-by-step drawing instructions.

Please see the drawing tutorial in the video below
You can refer to the simple step-by-step drawing guide below
Step 1
Okay, draw out the guides and shapes for you to have Zuko work with. Start with a circle for his head and then add face guides. Next, draw the body guide lines as you see here and move on to the next step.
Step 2
All you do in this step is start sketching his hairstyle. Make sure there are pointed bangs and hair that falls past the ears. Draw the eye lines and then move on to the next step.
Step 3
You will begin this step by drawing the shape of your torso as you see here. Make sure you’ve drawn the lines for his arm and then move on to the next step.
Step 4
Start outlining the circular scar on hiw’s face, then draw more of his shirt and then his hands. Add detailed lines to his shirt as well as a “V” neckline.
Step 5
Are these steps simple to follow? All you have to do here is outline the rest of his arms and hands, then outline the detailed fold lines on the middle sleeve of his long-sleeve shirt as shown. see here.
Step 6
Continue drawing the rest of the lining of his uniform or outfit. Add some detail to his right arm around the wrist and elbow. Make sure his pants are of the glossy type and add some details to the clothes.
Step 7
Finish pulling out your pants and knotting them at the knees. Draw a begging fold and then draw the rest of his legs and feet.
Step 8
well as you can see there really isn’t much to do here. All you need to do is erase all the guides and shapes and then detail the upper of his shoes as you see here.
Step 9
Color your character and you just learned how to draw Prince Zuko from Avatar The Last Airbender step by step. I hope you guys keep an eye out for the upcoming new Avatar movie.


4.5