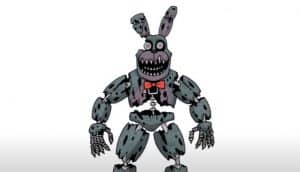
How To Draw Nightmare Bonnie with this how-to video and step-by-step drawing instructions. How to draw cartoons for beginners and everyone.

Please see the drawing tutorial in the video below
You can refer to the simple step-by-step drawing guide below
Step 1
For the first step, all you have to do is draw the guide for the head and then draw the guide for the function. Outline the facial guidelines then you can proceed to step two.
Step 2
For this first step, we’ll draw Bonnie’s snout and then sketch along the mouth opening. The top of the mouth should have a crease in it. Draw the nose too.
Step 3
Next, complete the mouth by drawing a second mouth. Add the pointed teeth and then outline in some beard holes and the rest of the muzzle shape.
Step 4
This is where we’ll start drawing the bottom of Bonnie’s nightmare mouth and jaw. It is very thick and bold and has a lot of wrinkles or cracks. Add some small bits of wire and nose detail.
Step 5
We’re going to start sketching some of Bonnie’s head structures. As you can see, it is cracked or torn. Once done, draw the eyes in different sizes and designs. When you’re done with the face, erase some principles on that face and outline in
Step 6
For the most part, Nightmare Bonnie’s face is complete. We will start this step by drawing the ear upside down. Notice that it is extremely tattered and has stitches and cords.
Step 7
All you have to do here is draw in Bonnie’s other ear. Add definition to the surface of the ear.
Step 8
This is the difficult part. You will need to draw on Nightmare Bonnie’s hands but they are in the form of long finger claws. The claws are long and thin. The fingers are made up of layers and should be drawn the way you normally would
Step 9
This is the final drawing step for Nightmare Bonnie. It will take you time to sketch her sleepy body starting at the neck and working down to her shoulders, arms, and torso. Details on the surface of the skin or body shall be identified by
Step 10
Before filling in the blanks, clear out the errors and instructions. The voids are located where you see the dark red solid spots. After you’re done adding the final strokes, you’re done with your drawing.
Step 11
That’s it. Now all that needs to be done is some color. Of course you do that once you’ve erased your mistakes and guides/shapes.


