How to Draw Shazam easy with this how-to video and step-by-step drawing instructions. Easy drawing tutorial for beginners and everyone.
Please see the drawing tutorial in the video below
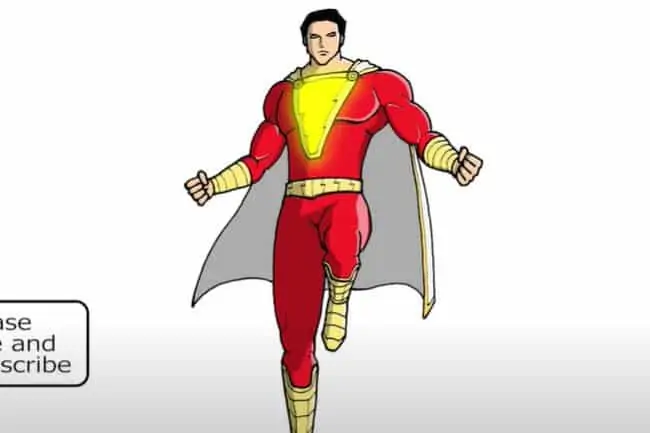
You can refer to the simple step-by-step drawing guide below
Step 1
So we started this drawing tutorial with stickman (a character’s skeleton drawn with simple lines). First of all let’s draw the head as a flat egg. Then, draw the line of the spine. On this line, we draw the chest and pelvis. As you can see, the ribcage and pelvis in this step look like normal circles. Using simple lines, draw arms and legs. Don’t forget that all paths should be made with very light lines.
Step 2
Now we are going to add some volumes to Shazam. First, let’s draw two symmetrical lines on the face. Outline the neck and body. Please note that the body should narrow a little to the pelvic area. Then, we draw giant powerful arms using simple geometries. Then we go down a bit and outline the pelvis and legs.
Step 3
In this step we need to outline some elements of the outfit and facial features. First, we draw a triangle located behind the left shoulder. Then, we draw a robe behind the back that hangs over the knee area. Next outline the contours of the gloves and shoes.
Step 4
In this step we will draw the face in the final version. Draw ears. The upper edge of the ear is level with the eyebrow, the lower edge is level with the tip of the nose. Draw the line of short hair. Erase the guides and circle the lines to make them smooth and clean.
Step 5
We continue drawing tutorials, in which we show how to draw Shazam from DC. Carefully draw the lines of the body, chest muscles and abdomen. In the middle of the chest draw the Shazam logo. Don’t forget the zipper on the collar.
Step 6
Outline the cloak, like in our example. Then you should draw Shazam’s arm. Traditionally, we circle the contours of the arms, drawing the muscles and folds of clothes. Also, here we need to draw diagonal strips on the frames.
Step 7
So it’s time to work on our superhero’s lower body. First, we draw a wide belt and a piece of fabric on the side. Next, draw the contour of the leg taking into account all the muscles and joints like in our example. Next, draw the outline of the high boots. Add the necessary creases and remove all remaining unnecessary guidelines from our Shazam.
Step 8
In the final steps of a manga-specific drawing lesson, we always add shadows, and this lesson on how to draw Shazam is no exception. In this case, we add comic-style shadows. So it will contrast and swell thickly. But you can make the shadows more contrasting and darker, and it will bring your drawing closer to the image from 20th century comics.
Lessons on how to draw Shazam (or Captain Marvel) are pretty tough, like all our lessons about superheroes and super villains. But we are trying to draw characters that are similar to what you might see on comic book pages, so we hope that guided by our tutorials, you can become artists real comic. The fact is that we’ve always loved comics, and always wanted to be able to draw like John Romita Sr or Jack Kirby. We have to learn by ourselves, study comic book techniques and gradually improve our skills. And we’re glad we were able to share our knowledge with people who wanted, like us, to be able to create picture stories. Don’t forget to subscribe to us on social networks (eg Google Plus, Facebook and Pinterest), to get all of .com’s new drawing lessons.


