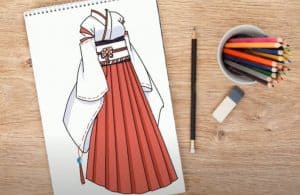
How To Draw A Kimono easy with this how-to video and step-by-step drawing instructions. Anime drawing tutorial for beginners

Please see the drawing tutorial in the video below
You can refer to the simple step-by-step drawing guide below
Step 1
Start with drawing some simple guides and shapes to form a workable frame for your kimono and model. Draw the head shape and guide on the face. You will then draw guidelines for shaping the shape and position of your body posture. Once done, you can draw outline shapes for her long flowing hair.
Step 2
You will start this step by sketching the long hairstyle on the model and then add some details. Once done, you can sketch out the shapes of the faces and then draw the initial shapes of the arms and hands.
Step 3
You will detail and define hairstyles for two models and then you can sketch their beautiful faces. Of course they look like manga/anime characters. Once their faces are outlined, you can start drawing the shape of the torso and kimono. Also draw the shape of the kimono sleeves on both girls and then add details and strokes.
Step 4
You’ll outline the half of the model’s torso in the upper left corner, then outline the obi belt on the kimono in the center. This is where you will add the design to the sash. After your design patron is drawn, you can sketch the length and width of the kimono. Move on to the next step to see what you need to draw next.
Step 5
This is your final drawing step and all you have to do is finish sketching the kimono and then draw the model’s legs. Once done, sketch the kimono sleeves and then add detail and definition. Draw the hand and then start erasing all the guides and shapes that you drew in step one.
Step 6
Here’s what your awesome sketch will look like when you’re done. Color it and that’s it. I hope you had fun joining me with this “how to draw a kimono step by step” tutorial.


