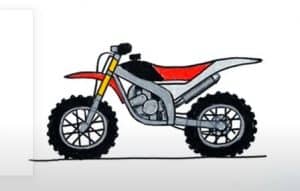
How to Draw A Dirt Bike easy with this how-to video and step-by-step drawing instructions. Easy drawing tutorial for beginenrs and everyone.

Please see the drawing tutorial in the video below
You can refer to the simple step-by-step drawing guide below
Step 1
Start by drawing two circles to form the wheel.
Step 2
From the center of a circle to a point outside it, draw parallel lines. Erase between them and connect them in the center of the circle. Draw a small circle. Then draw successively smaller circles inside the wheel, demarcating the tire, wheel, and rim.
Step 3
Draw a pair of similar lines across the remaining wheel and erase between them. Connect them at each end. Use a curved line to enclose a circle in the center of the wheel and draw successive smaller circles to represent the tire, wheel, and rim.
Step 4
Next, let’s draw the bike’s engine and transmission. Use curved lines to enclose a variety of irregular shapes. Draw a large circle in the center and a small circle inside the adjacent shape.
Step 5
Next, draw the body of the motorcycle. Use a series of lines to enclose a zigzag or lightning bolt. Extend a few lines upwards from the front wheel and draw a small rectangle at the top. This is called the fork.
Step 6
Use curved lines to outline the pointed front panel. Extend the lines leading to the handlebars and enclosing a circular parallelogram in front.
Step 7
Draw handlebars. Stretch a pair of lines and surround them at the end with a circle. In the blank, draw a cylinder, complete with a circular, three-dimensional tip.
Step 8
Complete the body of the motorcycle. Use curved lines to outline the saddle and exhaust, and straight lines to elongate the body.
Step 9
See details of the wheels. Draw a straight line between the engine and the rear wheel. Draw small hexagons to abrade the surface of each tire, erasing as necessary. Draw lines to indicate the spokes.
Step 10
Color your cartoon dirty bike.


