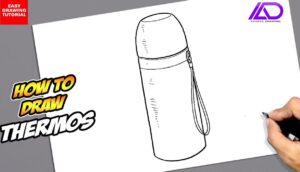
How to Draw Thermos with this how-to video and step by step drawing instructions. Grab some art supplies and follow along with these simple 6 drawing steps.

Please see Thermos drawing tutorial in the video below
You can refer to Thermos simple step by step drawing guide below
Step 1. Draw the body of the thermos bottle
Start by drawing a vertical cylinder to form the body of the thermos.
Step 2. Shape the lid
Next, form a short cylindrical lid above the thermos.
Step 3. Add rubber sole
Add a thin rubber base below the body of the thermos.
Step 4. Attach the handle
Draw a long curved shape connecting the top and base of the thermos to form the handle.
Step 5. Add lid
Then add a cylinder next to the thermos to draw the lid.
Step 6. Complete the thermos bottle drawing
Turn your thermos drawing into reality! First, use a dark gray pen to color the lid and handle of the thermos. Next, shade the top and base of the thermos with a light gray pencil. Then, use a blue pen to color the body and lid of the thermos.


