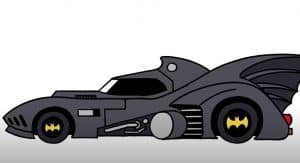
How To Draw The Batmobile easy with this how-to video and step-by-step drawing instructions. Easy dreawing tutorial for beginners and everyone.

Please see the drawing tutorial in the video below
You can refer to the simple step-by-step drawing guide below
Step 1
To draw the Batmobile you need to draw some shapes and instructions. You will first need to draw two ovals and then add guide lines that will be the length of the car.
Step 2
You will now start sketching the top half of the Batmobile starting with the roof and windows. Once done, you can start sketching out the shape of the fins, and then the dome shape of the hood as you see here.
Step 3
The Batmobile’s fins are said to look like bat wings. Draw more of the rear shape of the fins and then outline more of the Batmobile’s hood and front fenders as you see here. The pointed front fender is like an arrow, so you have to draw that as well.
Step 4
Draw the narrow shape of the window and then complete the outline of the car’s front design. Next, draw the tire shapes and then the wheel as you see here. Next, add the windows, and then the detailed lines of the car’s design.
Step 5
Before you start working on the wheels, you need to finish drawing the body of the Batmobile as you see here. Detail and define its design, as well as outline piping and specifications. Once done, you can go ahead and sketch the contours as you see them here. Take your time to make your work appear to look great.
Step 6
For your final drawing step, you’ll be adding air vents on the side of the Batmobile’s shape. Once done, you can start erasing all the principles and shapes that you drew in step one.
Step 7
Here’s what you’ve finished drawing of what the Batmobile will look like when you’re done. Color in and you’ve just learned “how to draw Batmobile step by step”.


